Creating wedding or baby shower registries with thirty bees
If you need to add a Wedding or Baby Shower registry to your web shop, then thirty bees is the perfect solution, coming with a full-fledged wishlists system out of the box.
Today we will see how to install, use and customize it to fit our business needs.
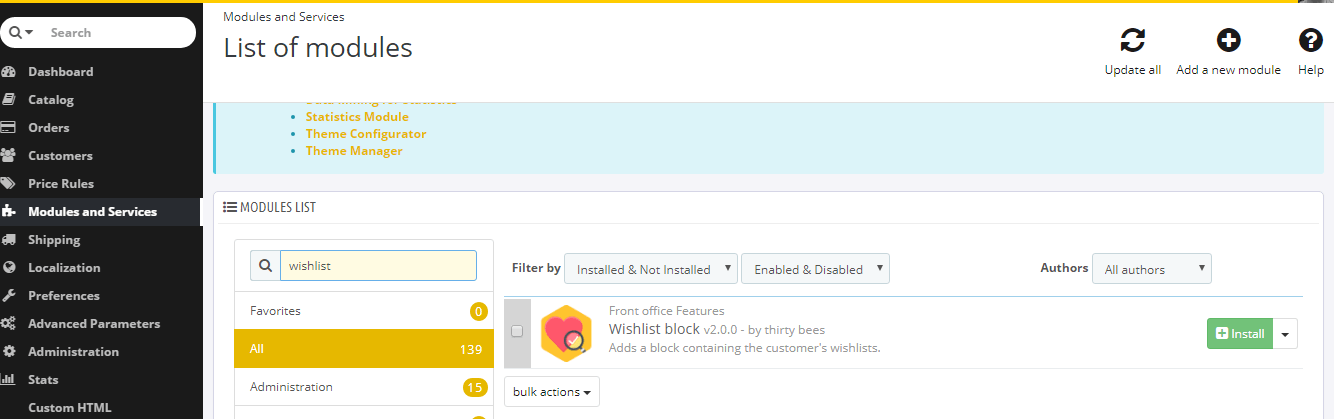
The first thing to do is install the Wishlist module, from the back-office’s Modules and Services panel:
After it’s successfully installed, let’s reach the front office, login as a customer, and in the My Account page, we will see a new link reading “My Wishlists”. This text, along with all of the others concerning this module, can easily be modified directly from the translations panel so that it better fits the Wedding or Baby Shower Registry business.
Let’s see how this works: in the back-office, let’s click on Localization, then Translations.
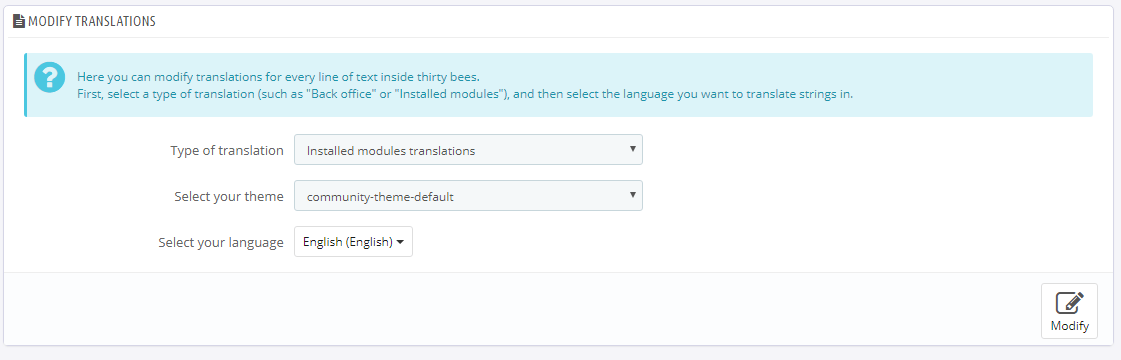
It’s important to make sure “Installed modules translations” is selected, along with the correct template in use and the language we want to update, then click Modify.
We are looking for the “My wishlist” text we just saw in the account page, which can be found under the header “module blockwishlist”, and specifically in the “MY-ACCOUNT” block:

It might be necessary to click on the box to have it open and reveal the text. Once done, just let’s hit save, and refresh the front office to see the updated text.
Easy! All of the other wishlist-related texts can be modified the same way. Let’s go ahead and access the wishlist page. Since there is no wishlist yet, we are prompted to create one:
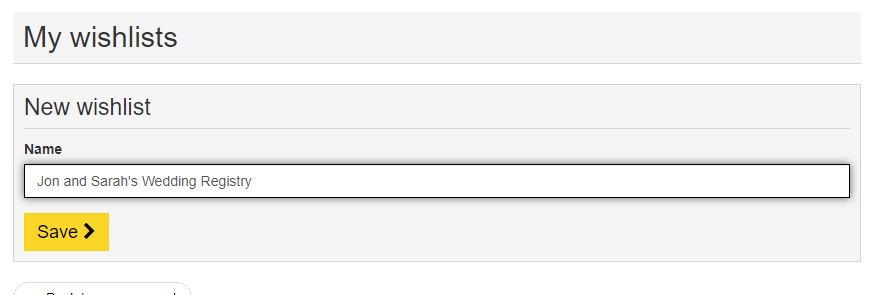
Customers are given the freedom to either manually create a list from this page first, and later add products, or start adding items directly without having a pre-created list. In this case the list will have a generic name instead of the one chosen by the customer.
Now that we have a wishlist, let’s add a product! After installing the module, all products will have a new button, right underneath Add to Cart
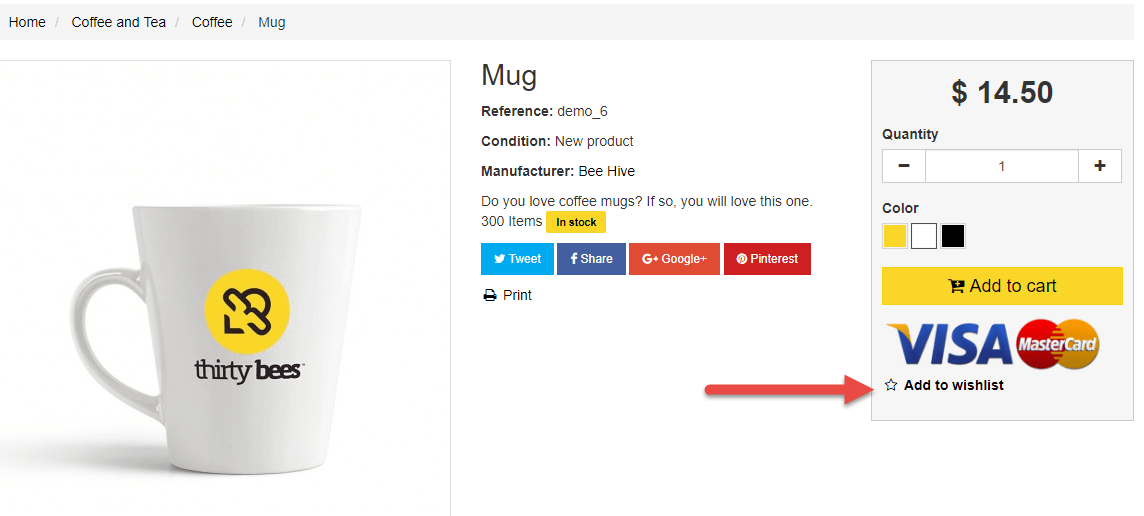
If the customer has multiple wishlists, the one marked as default will be used for the product. Let’s add it, then reach back to the wishlist page and see how it changed:
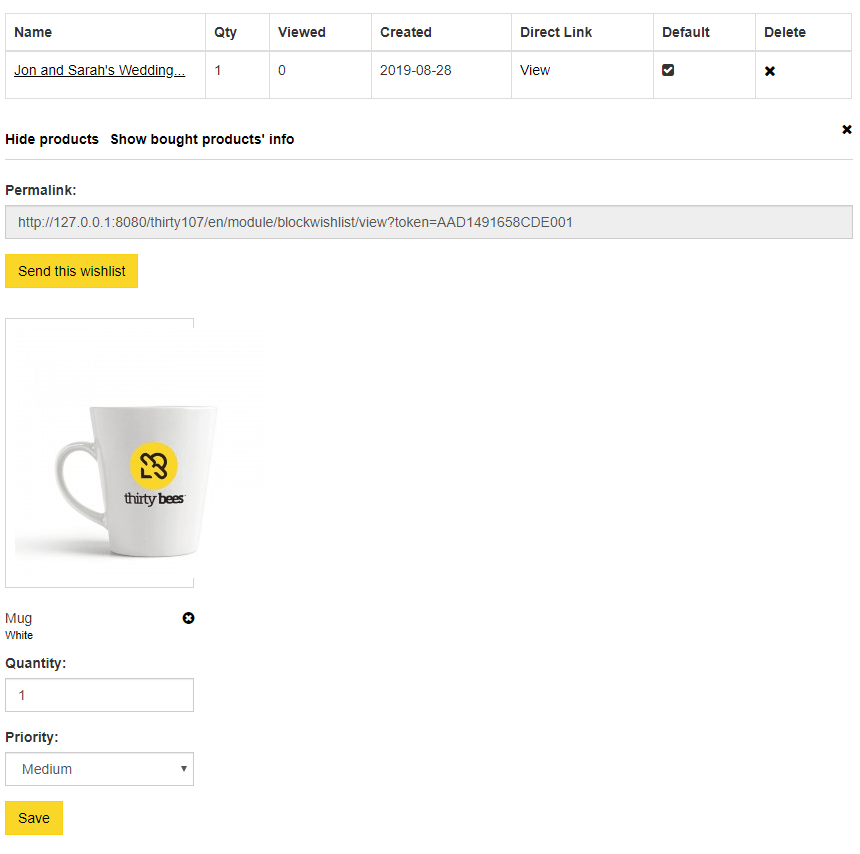
By clicking on the name, a list of the products it contains will display at the bottom. This is where the module comes in handy to create Wedding or Baby shower registries: each wishlist has a unique permalink, and can easily be shared by copying and pasting it manually, or even send it to up to ten different friends using the built in “Send this Wishlist” system.
For maximum flexibility, the customer will also be able to specify how important an item is, and how many units she wants.
After a list is created, us, as merchant, will be able to check what it contains from the back office. Let’s reach Modules and Services again, search for “wishlist”, and click Configure on the Wishlist Block module.
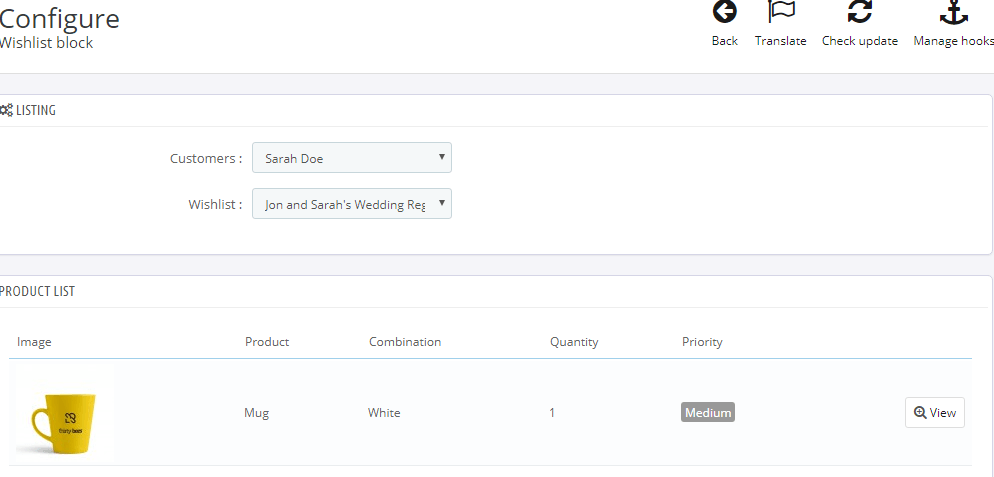
By choosing the customer, and the list she created, we will have access to the products that have been added to it.
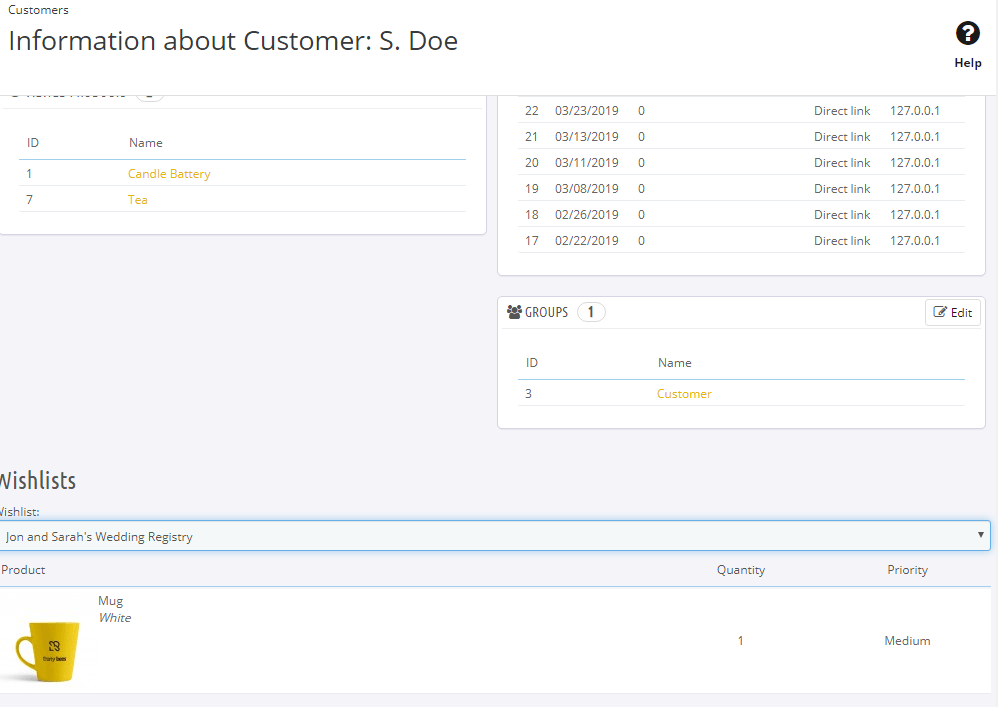
The wishlists will also be available for review on our side in the customer information page, under Customers, clicking each customer’s name:
And that’s how easy it is to create Wedding or Baby Shower registries in thirty bees! If you haven’t picked up the software yet, here is a demo to try it out yourself, as well as a link to the download page.
Time to make some couples happy!