Today we will have an overview of two special types of products thirty bees natively supports: virtual products and products pack.
The Virtual product type
Virtual products are the go-to solution for anything that does not require shipping, and usually includes a file that can be downloaded as well. If you are familiar standard products, you might be wondering what’s the difference between attachments and virtual products: while attachments are always available, virtual products’ files cannot be accessed before buying the product. This means virtual products are the ideal solution if you are selling software, plugins, or even ebooks.
Let’s set up a test virtual product to see how it all works. From the products list, let’s click Add new product.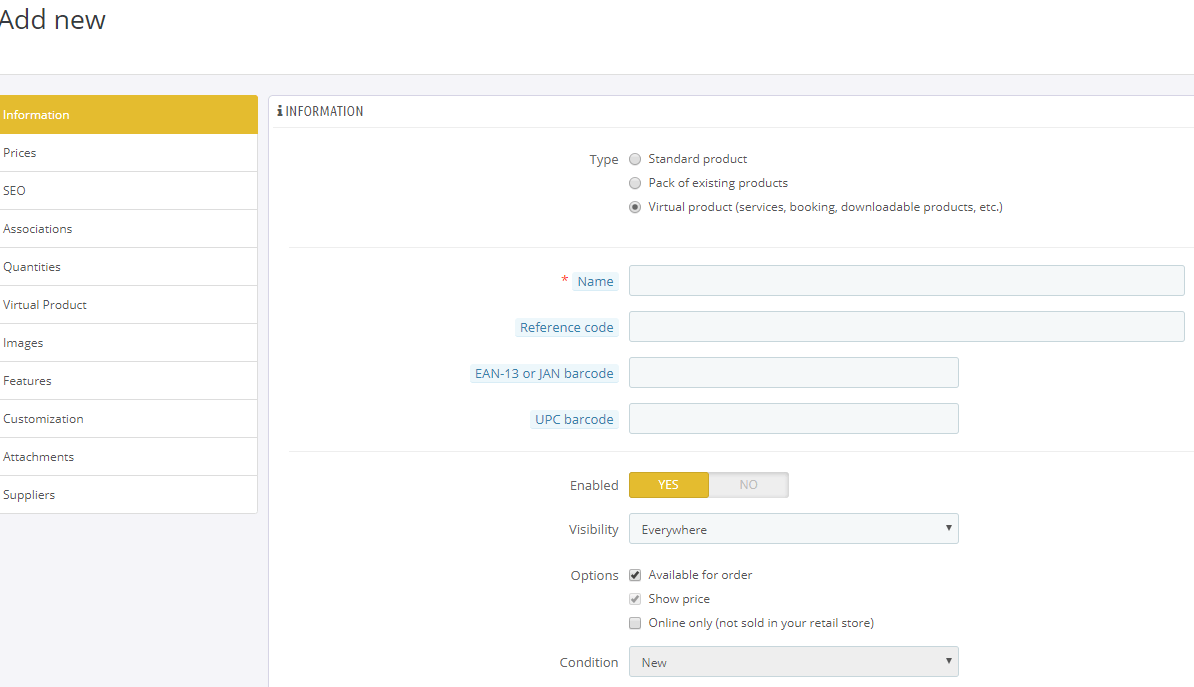
In the Information screen let’s choose Virtual Product as Type. Immediately, you will notice the Shipping and Combinations items on the left menu have disappeared. For obvious reasons, it’s not necessary to set up shipping for a virtual product (hence the name), but what about combinations? At the time being, virtual combinations are not supported in thirty bees out of the box, however if you are a developer and can handle possible exceptions and errors, you can try this tutorial, which works in thirty bees as well.
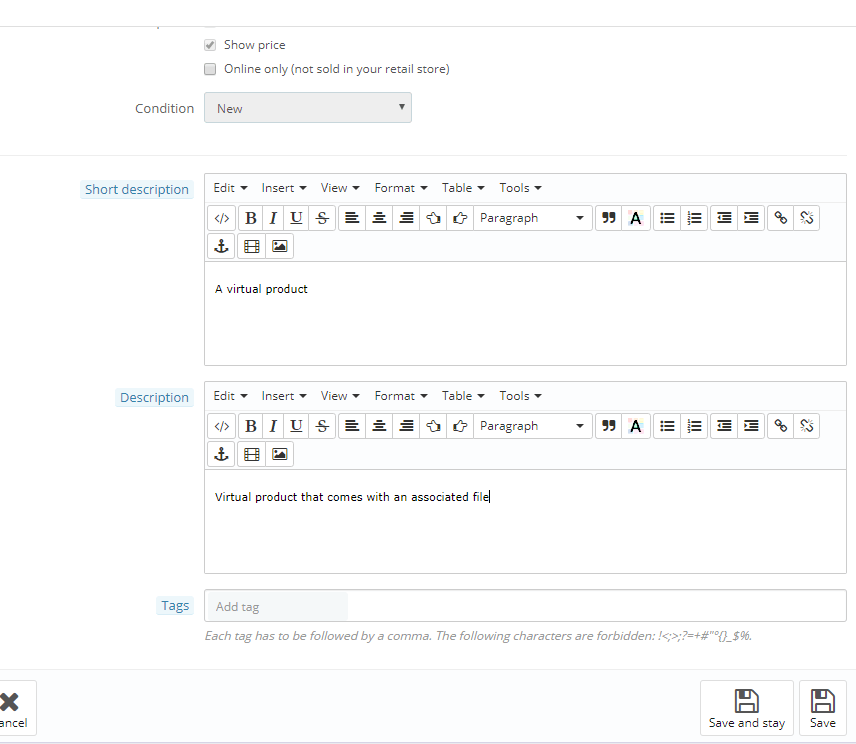
Next, let’s set up some basic information for the product, such as name, reference, and descriptions, leaving the other options as default, then hit Save and Stay:
At this point we can start thinking about the virtual good itself. We want to set up a downloadable file, so let’s click on Virtual Product, then set Does this product have an associated file? to yes.
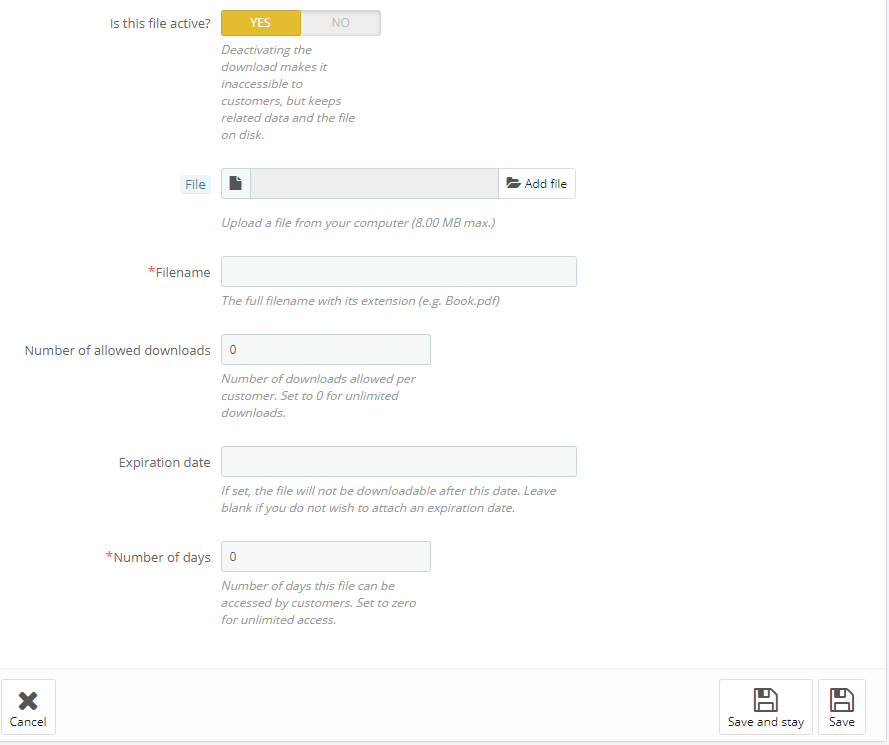
Here we can set up all of the options required for the file to be accessed at specific conditions.
Is the file Active?: this option is useful if you temporarily want to disallow the file’s download on your customer’s end, while at the same time keeping a copy of it on the server.
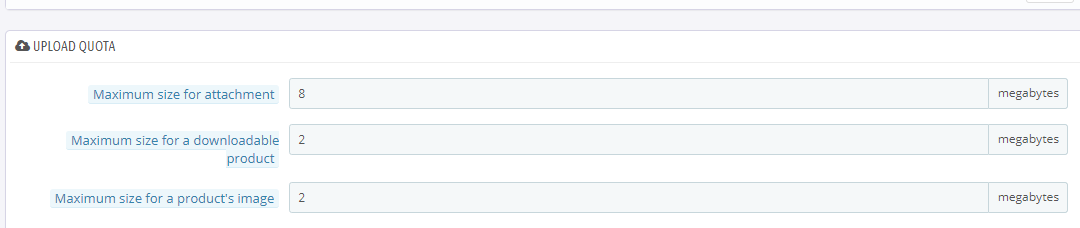
File: this is where we can upload the actual file people will have access to after buying the product. The size can be tweaked from Administration, Preferences:
Back to the virtual product page, let’s click on Add File and choose a file to be uploaded. In my case it’s the default thirty bees theme.
Filename: will automatically be populated, and I suggest not changing it, but rather the actual file name before uploading, unless you really have to.
Number of allowed downloads: sets the maximum number of times the file can be downloaded, for each customer.
Expiration date: is useful for products you don’t want to be accessible forever. After this date, the product download will be disabled for everyone, regardless of when they purchased it.
Number of days: differs with the above in that it allows a certain number of days after the purchase for the product to be downloaded. This will be different for each customer.
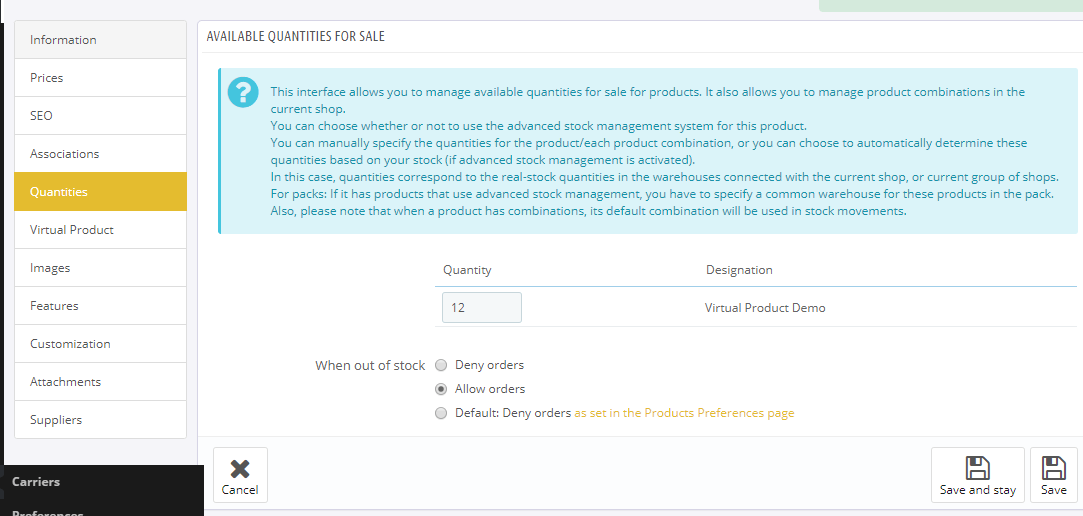
Let’s leave the options as default, then click on Prices and set any non-zero price for this item. Also, let’s set the quantity in the quantity tab to anything above zero. Then click Save and Stay:

The product is ready to be tested! Of course, all of the options available for Standard Products can be set for Virtual ones as well (such as images, features and so on), but right away we can see if the settings are working and the file can be successfully downloaded. To do so let’s click preview in the top right to reach the product, then buy it using any payment method, set the order to Payment Accepted in the order manager, and reach the customer’s order in the front office:
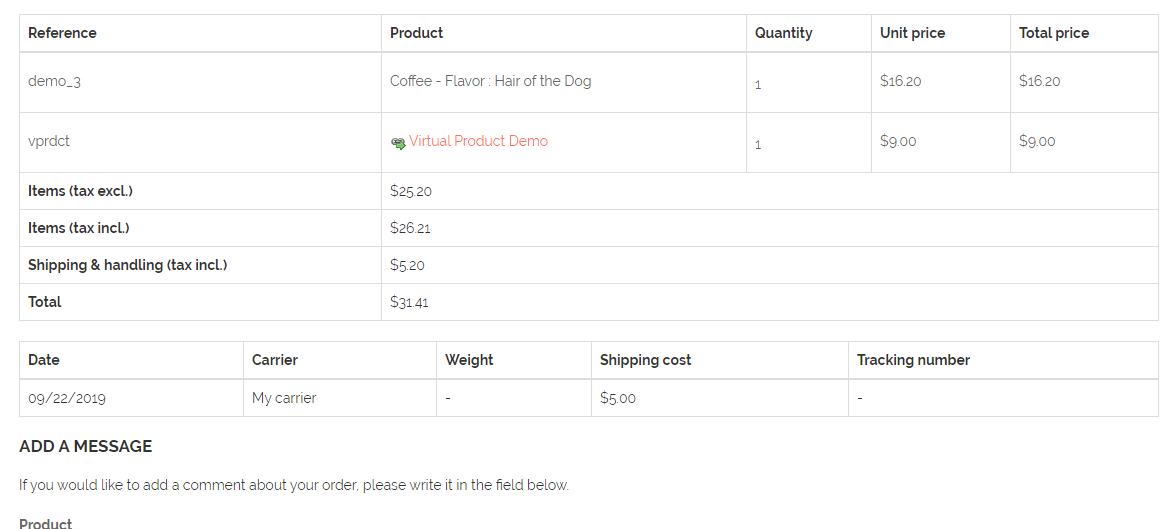
The virtual product will have a link icon so that it can be downloaded, according to the settings!
The Pack of Existing Products type
The Pack of Existing Products type, or simply “Pack product”, is a collection of other products that are already available in the store. Packs cannot contain virtual products, but only standard types, which also need to have a specific combination set (when present). Let’s see how to set up one!
From the main “Add a new product” page, let’s check Pack of existing products as type. The Combinations tab will disappear, and a new field will pop up in the Information tab:
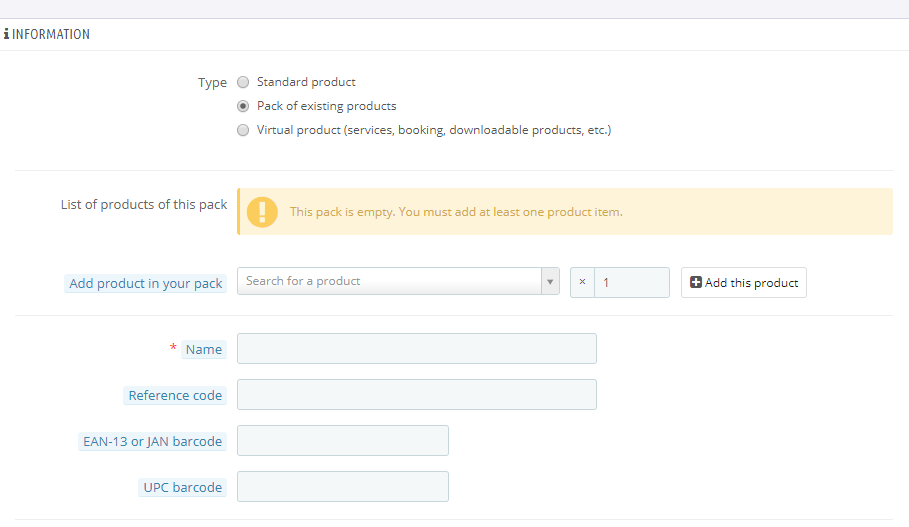
As soon as we start inputting a product name in the new input, a list of matching available products will drop down. Let’s choose one, then click on Add this product, and repeat for another one.
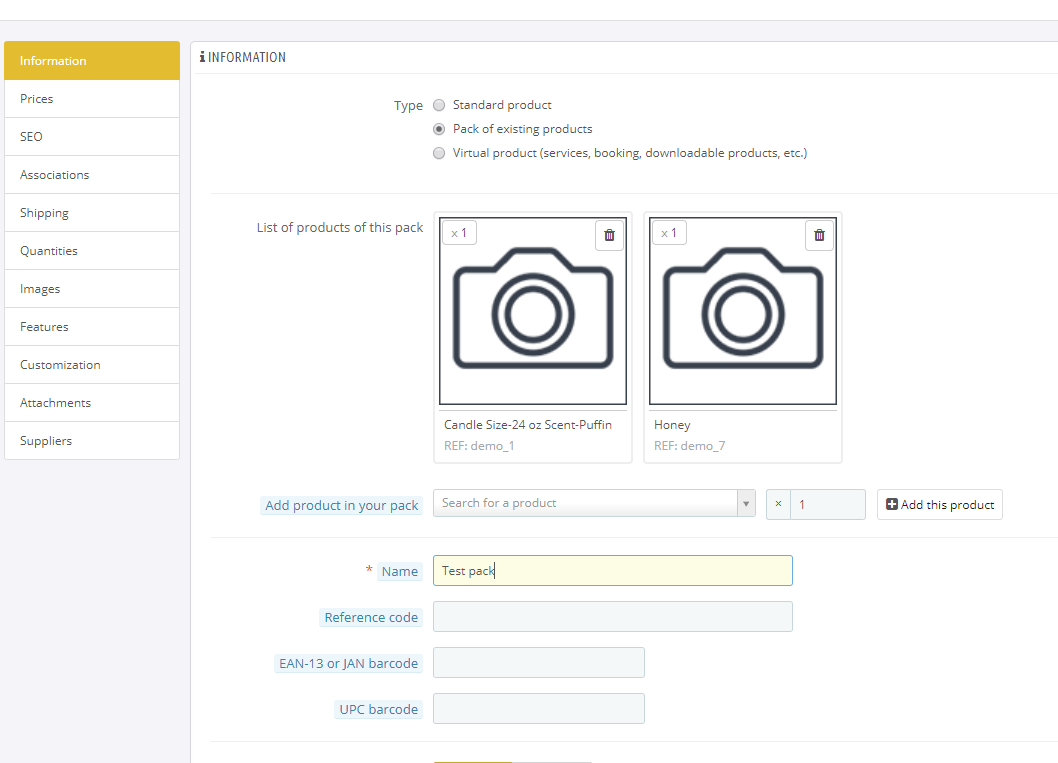
Let’s choose a name, and hit Save and Stay. It’s important to notice two things: product quantities cannot be chosen once the product is added to a pack, so it will have to be removed, and re-added if that’s what we need. Secondly, and most importantly, the quantities cannot be changed or chosen by customers in the front office. Before testing, let’s make sure it has a price, as well as a quantity that is more than 0.
With regards to quantity handling, Packs offer us several options to choose from:
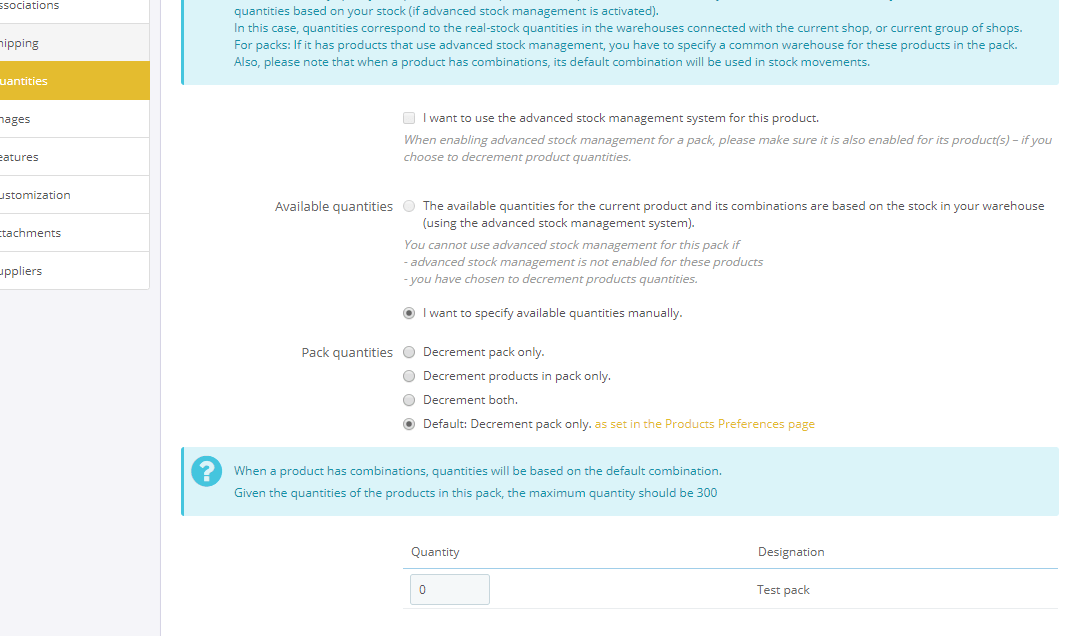
If we want the single components’ quantities to be reduced, we can choose the first option for available quantities. This will disable the pack in case one or more products it includes are out of stock. This option, however, is only available when using advanced stock management, and cannot be selected without it.
Next, we can choose what to do when a pack is purchased:
– We can reduce the pack’s quantity (that is set below)
– We can reduce the quantity for single products inside the pack
– We can reduce both
By default, only the pack’s quantity can be reduced. For this example, let’s set Quantity to any value above 0, like 10, and hit Save and Stay.
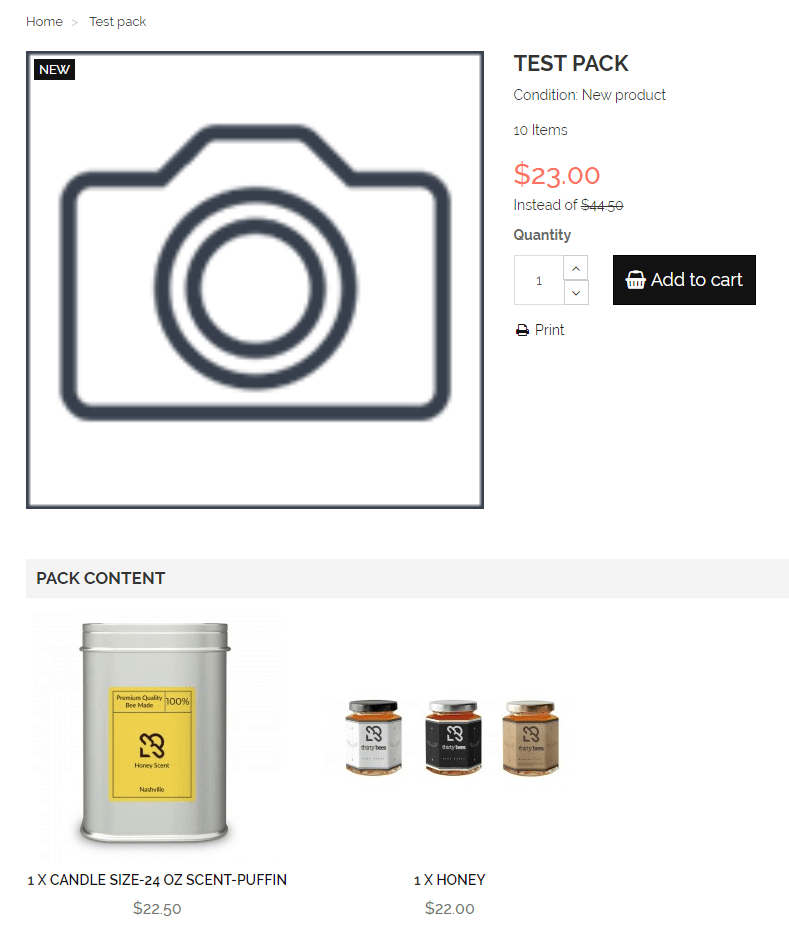
As soon as we test in the front office, we will see the Pack Content tab is populated with the products we chose. It’s also important to notice the customer will be able to see how much he is saving by buying the pack, directly below the pack’s price.