After seeing how to create a simple product in the last article, let’s now dive deeper into more advanced configuration options for thirty bees products.
Product Features
In thirty bees, product Features represent static characteristics of the products, such as height, width, or even color. These cannot be changed by the user, but are purely informational.
From our main product view in the back office, let’s click on Features:
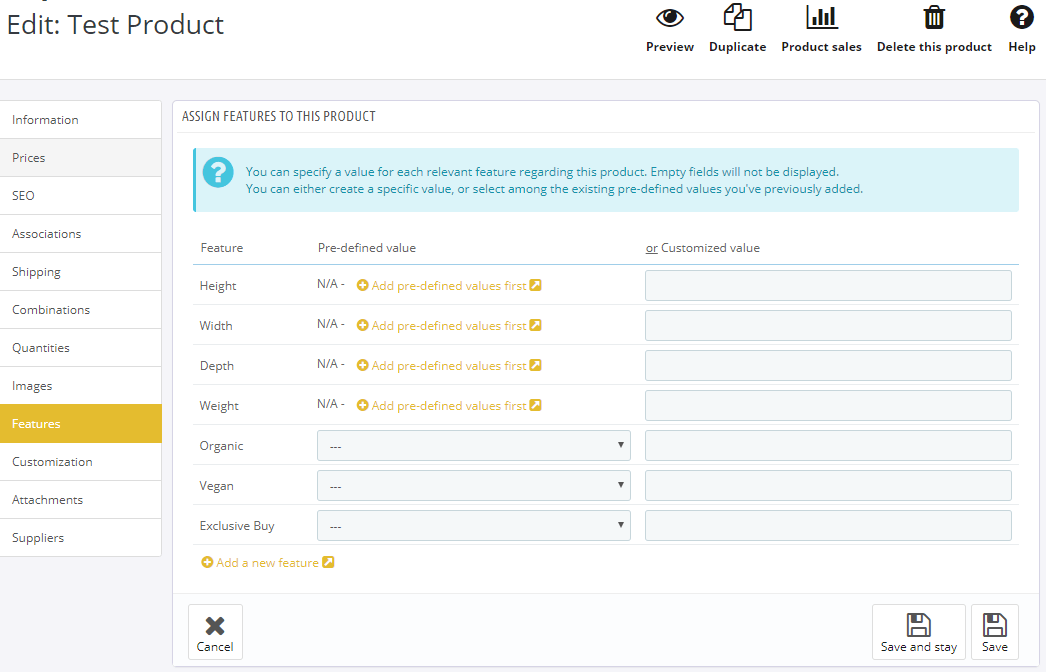
This is the list of all of the features that are currently available. It’s possible to save a pre-defined value, or use a customized one (just text, basically). Let’s actually add a new feature! Click on Add a new feature.
Let’s just call it “New Feature”, and click save. We will reach the features list page, where we can view and edit the currently available features. Let’s click on our new one, then Add new Feature Value.
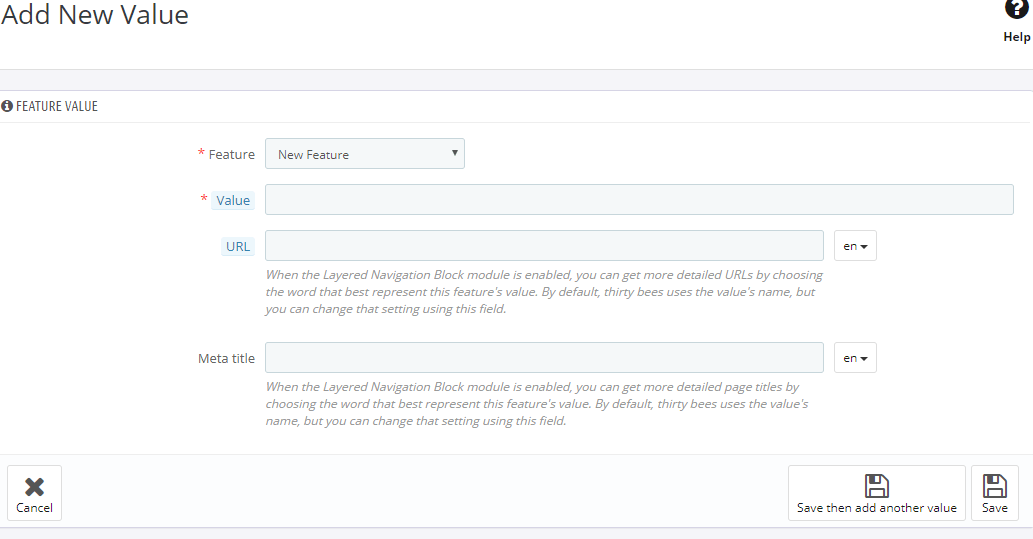
Value is the text that will represent the value for that feature. For example, for a pre-built computer, it could be the SSD capacity, like 128gb, 256gb, etc.
URL is only used in conjunction with the Layered Navigation module, to have a specific link to access the product list, filtered by this value. Meta title is also exclusive to the module’s usage, and changes the page’s title according to the selection.
Let’s add any value, then hit Save to be brought back to the features list. Let’s go back to Catalog, Products, and edit our product once more. If we click on Features now, we will see our new one at the bottom of the list.
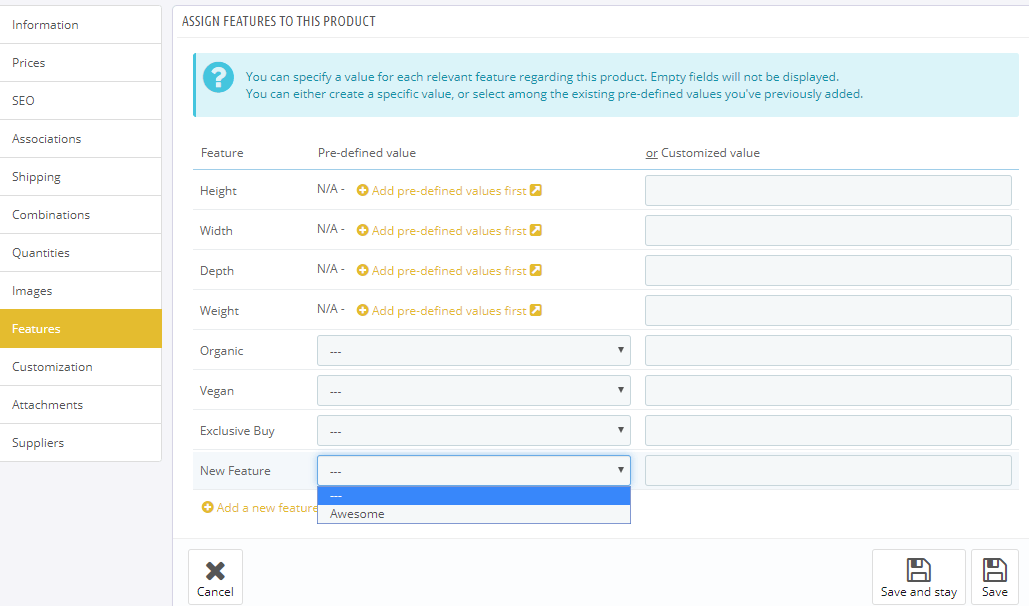
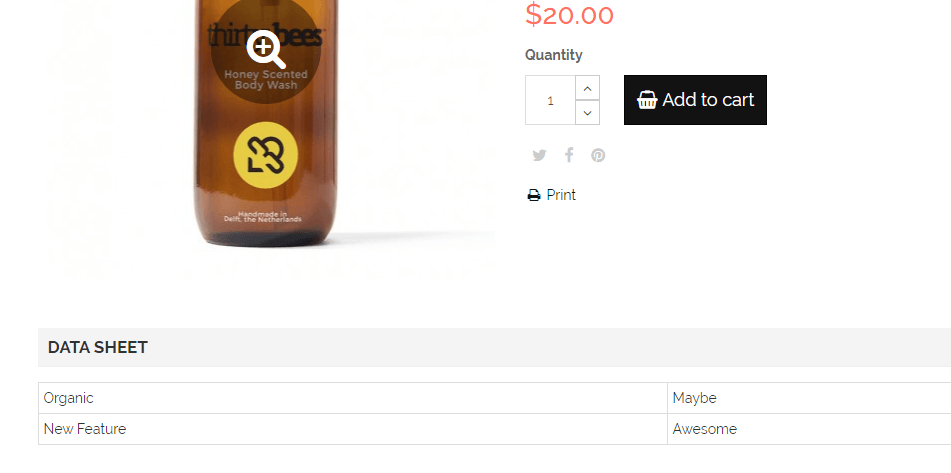
All of the features containing pre-defined values will have a dropdown, so let’s click on it and choose the value we just added. We can also, of course, use a customized value for any of these, but not both. When present, a custom value will always be displayed in place of any pre-defined one.
Product Customization Fields
Let’s now take a look at customization. In thirty bees, it’s possible to set up one or more customization inputs, to allow the user to add any custom text or images to the products they are buying. This is incredibly useful, for example, if you sell t-shirt prints, or any kind of customizable objects like dog tags, engraved jewels, and so on. In the product’s back office, let’s click on Customization.
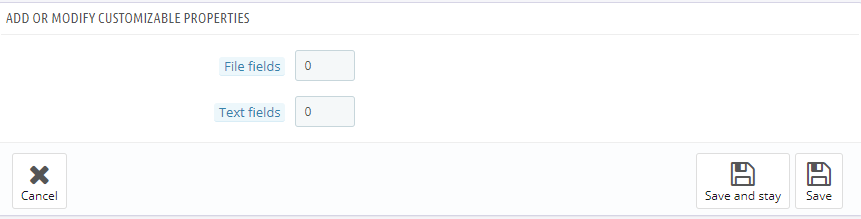
There is not much to see right now, because there are no fields added to the product. Let’s add one file field, and one text field, by setting both of the inputs to 1, then hitting Save and Stay.
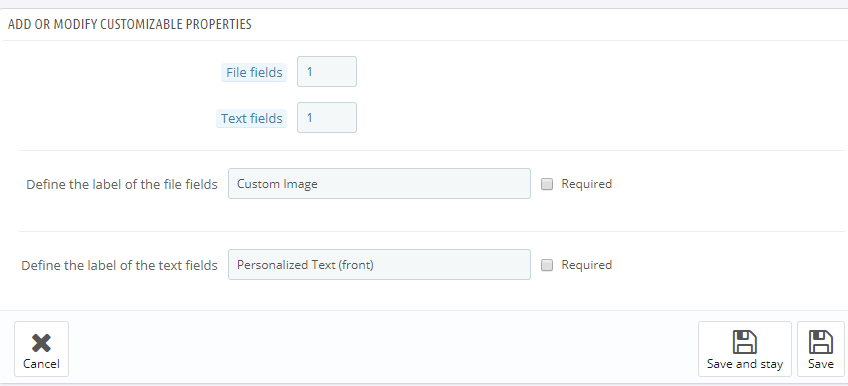
We can now choose a label for each field, and whether or not it is required to add a value, or file. Bear in mind that a required field will prevent adding the product to the cart without a value added to it.
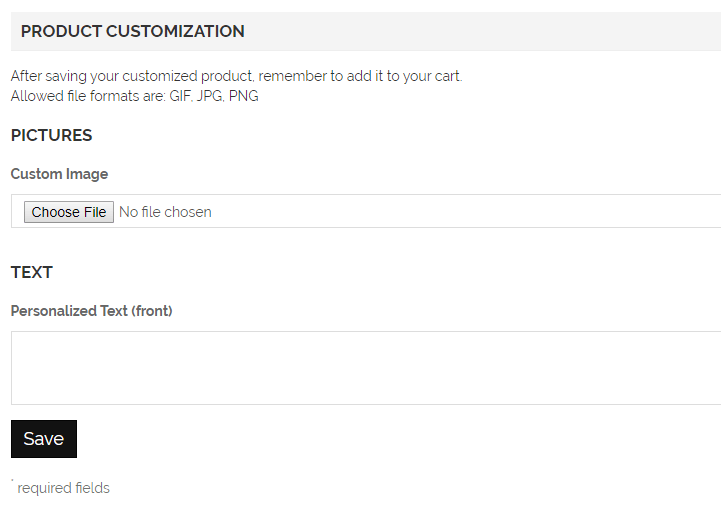
In the front office, customers will see this form, and will be able to save their information prior to buying the product.
Attachments
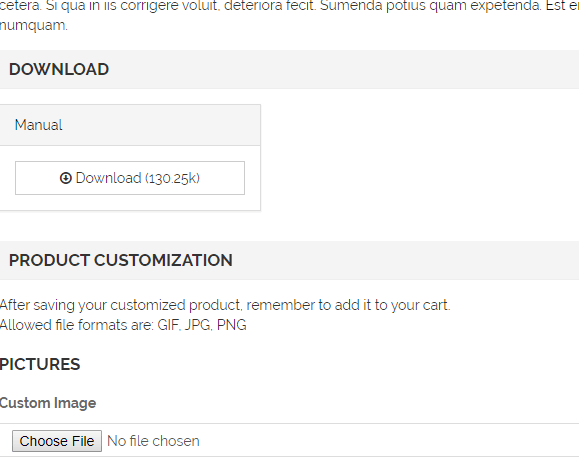
If you sell goods that have technical specifications, or manuals, it’s sometimes not convenient to add all of the information in the product’s description. This is where attachments come in use, allowing us to add a downloadable file to any product, that can be viewed any time. As we will see in a later article in this series, if instead we want a product to actually consist in a downloadable file, then Virtual Products are a better choice. Attachments are available to anyone viewing the product page, at any given time.
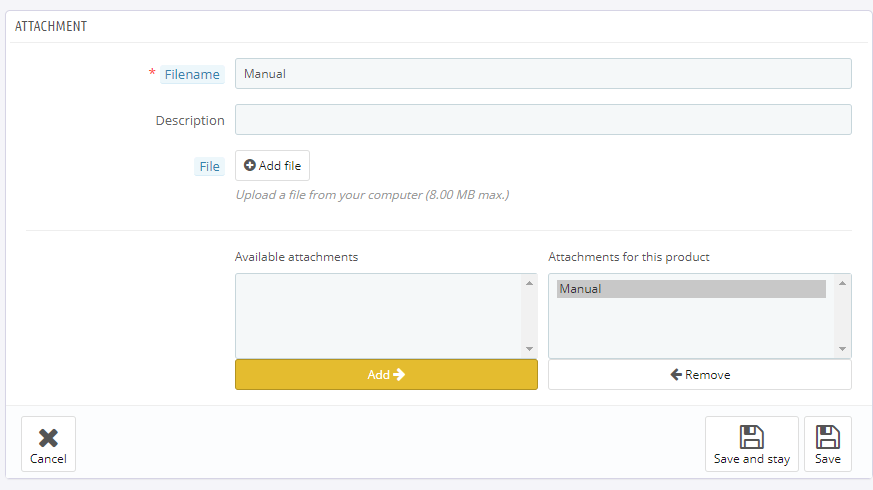
Adding an attachment is really easy: write a name for the file, then click Add File to upload it. The new file will appear in the Available Attachments tab. This tab lists all of the attachments in the shop, and is shared across all products. To add this one to this specific product just click Add, then save.
A new box with the download link will appear at the end of the product page.
Shipping
The shipping tab is useful to calculate the shipping cost for each product. 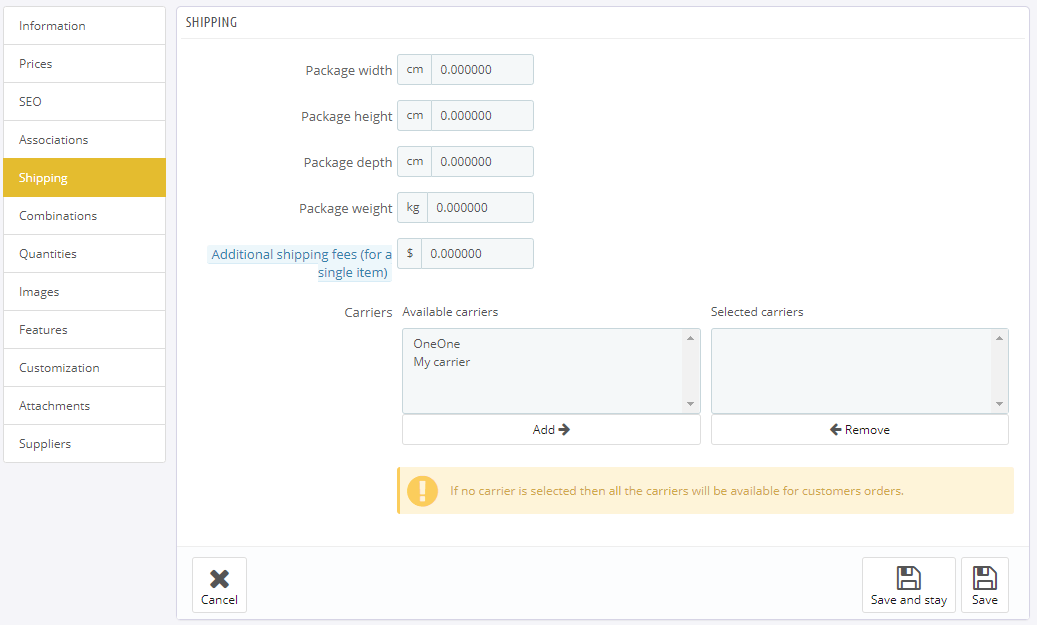
We can set linear dimensions for the product, that will be taken into account if the carrier uses size limitations, as well as the weight, which is summed up for each cart to determine the weight range it falls into. We can also add a special fee in case the product is somehow more expensive/laborious to ship.
Lastly, in the Carriers tab, we can set which carriers will be able to deliver this product. If none is selected, all of them will be available. It’s particularly important to check this tab whenever you get the “No carrier available” error message during the checkout, as it is likely to be the culprit of it.
SEO
Last but not least, let’s take a look at the SEO option thirty bees has to offer, by clicking on the corresponding tab.
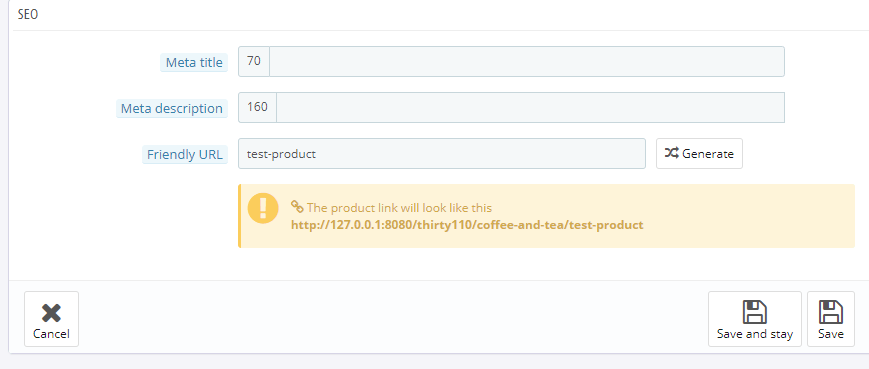
Here we can choose a meaningful title and description, that will be displayed in the search results, as well as the “pretty url” for this product. It’s recommended to use meaningful keywords in all these fields, and keep them within the limits. As a side note, the Friendly URL will only be used when URL Rewriting is enabled in the SEO & URLs settings page.
Conclusion
At this point we have enough information to build a really solid product list. But wait! There is more. In the next article we will have a deeper look at Attributes and Combinations, a vast topic in and of itself!