Today we will see how to set up shipping in thirty bees, and what kind of options we have to customize and fine tune carriers and prices.
Preparing products
Before messing with any shipping options, it’s important to understand that many of the carrier settings will be affected by how each product’s shipping options are configured. Let’s access a product, and tab to “Shipping”:
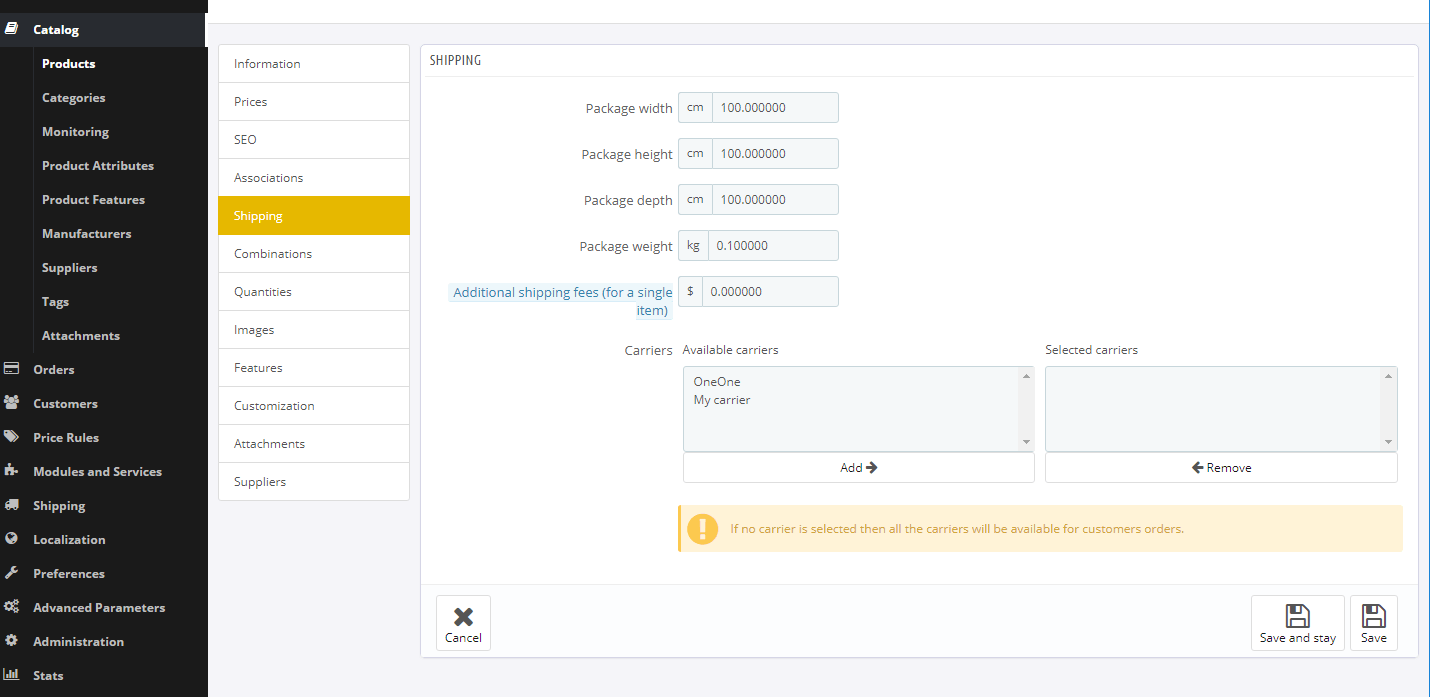
The first three options are seldom used without third party modules, as the standard carrier system only considers each item’s size for the limits, rather than summing them all up, so we can freely skip them.
The package Weight, on the other hand, is very important. As we will see, it’s possible to set up a shipping method’s cost to be based on weight, that is the total weight of the order. All products’ weights will be summed up, and the total will be considered when calculating the shipping cost.
It’s also possible to add an extra cost for each item, meaning that whatever we enter here will be multiplied by the number of items in the cart, and added to the shipping cost.
The Carriers tab is where merchants often get confused. This tab allows us to select specific carriers for each product, effectively disabling all of the others. This is useful if you have some carriers that ship overseas, but a product is too large or too heavy to be. When no carrier is selected in this tab, all of them will be available.
Bear in mine that all carriers under Available Carriers will NOT be available for this product, while instead all of the ones under Selected Carriers will.
For the time being, I will set the item’s weight to 1kg, and save.
Setting up a weight based carrier
Now that we have at least one product to play with, let’s create a new carrier and see how to set up shipping based on the cart’s weight.
From the side menu, let’s click on Shipping, then Carriers.

The first screen of the carrier wizard will contain some basic information about this shipping method:
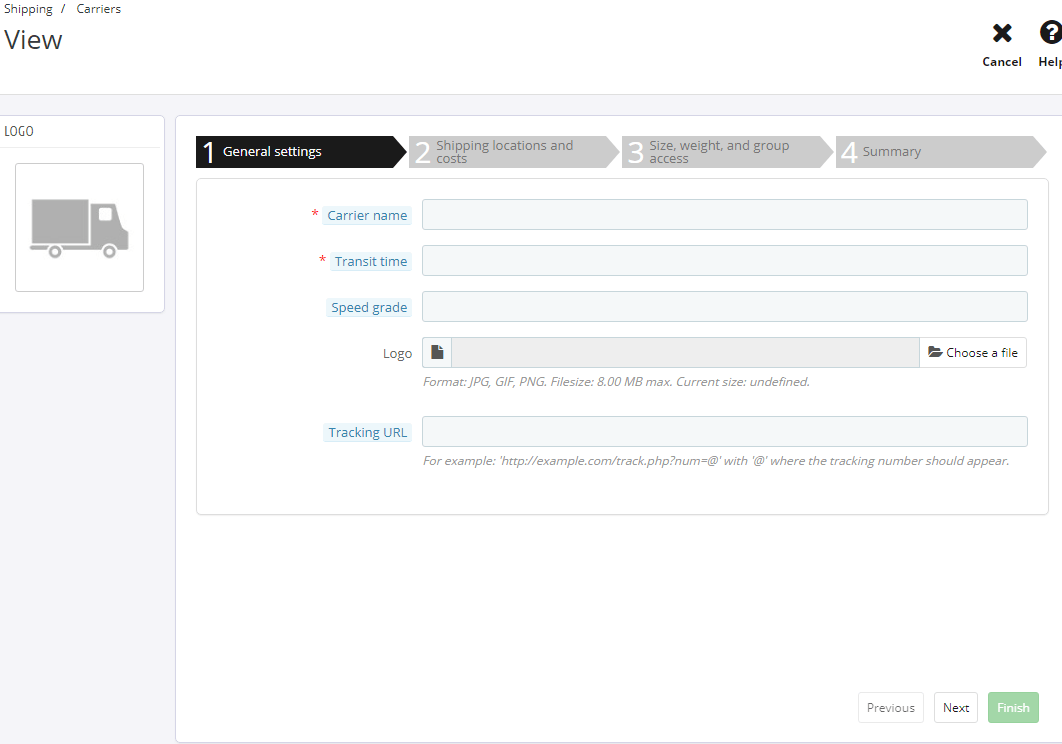
Both Carrier Name and Transit Time are used mainly in the front office to inform your customers about what they are choosing as shipping method.
Speed grade, on the other hand, is used internally to sort the carriers in case the specific option is selected within the carrier preferences.
Of course, can can add the shipping company’s logo, as well as their url for tracking the order once it ships.
This last parameter is very important, and we should always remember to add the “@” sign wherever the tracking number should appear. For example, if the tracking url for the company is http://fedex.com/track?num=, then we would have to write http://fedex.com/track?num=@. Failing to do so will make it impossible for the customer to check his order status on the carrier’s website, so always double-check the setting.
Once done, let’s click “next” and access the Shipping Locations and Costs page.
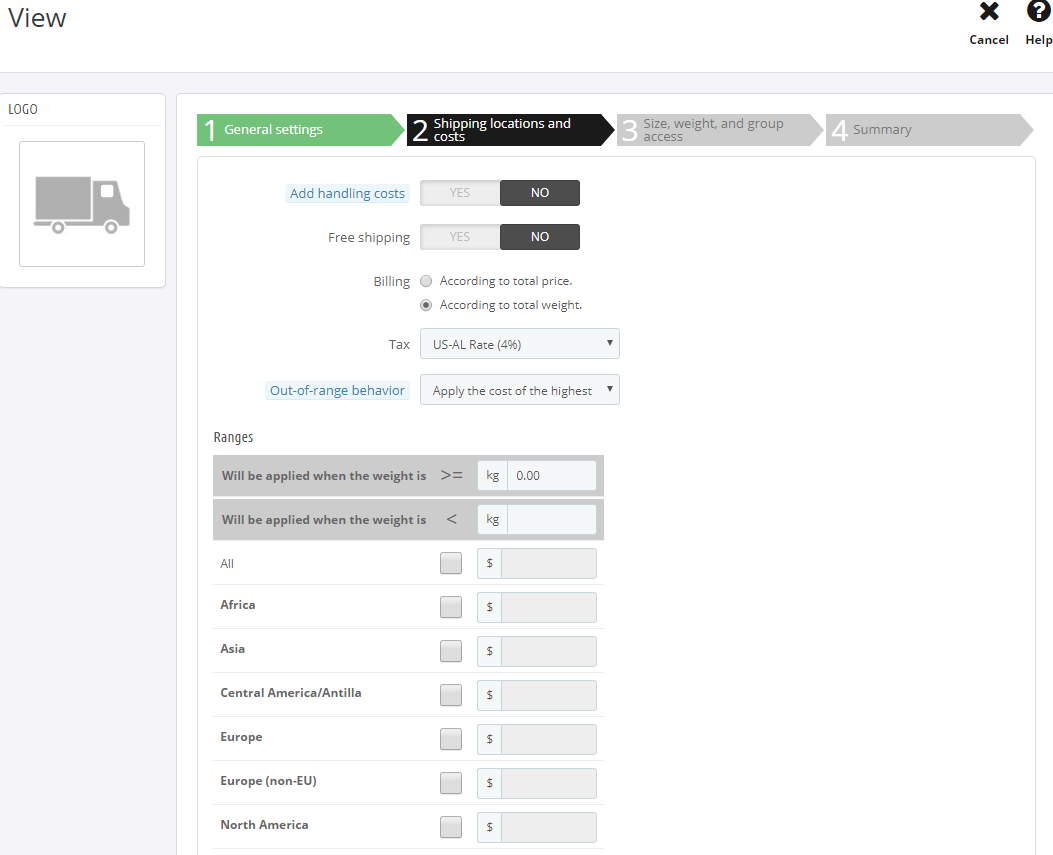
This is where the juice of the system comes into play.
First, we can choose if this carrier has some additional handling fees, which can be set up in the carrier preferences. They are the same for all carrier since they are supposed to represent the cost of your own shipping process, regardless of the chosen carrier.
When Free Shipping is set to yes, the carrier will always be free, regardless of the ranges defined below. Tax is pretty self-explanatory too, and allows us to apply a specific tax to the carrier cost.
Out-of-range behavior is what’s going to happen should the cart’s value exceed the settings. We can choose to completely disable the carrier, or apply the highest possible cost.
Also notice I left the Billing option set to “According to total Weight”.
Ranges are by far the most important part of this tab. Here we can set prices and zone availability for the carrier. All of the names on t he left represent Zones, that can be configured from the back office, accessing Localization > Zones. You can think of a zone as a macro area containing countries, very useful for setting shipping carriers for more than one country at the time.
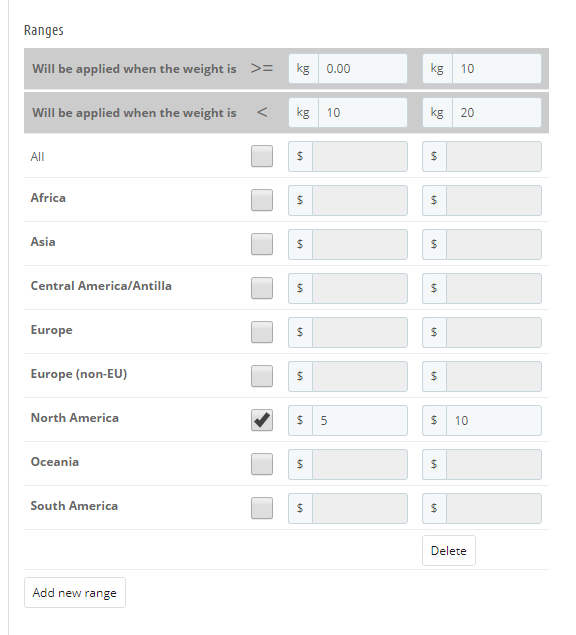
Back to the ranges, in the example above I have set the carrier to only ship to North America, charging $5 for weights up to 10 kg, and $10 for anything between 10 and 20. The out-of-range behavior was set to “Apply the cost of the highest range”, so that anything exceeding 20 kg will still be charged $10.
The next page contains various options for limiting the carrier’s availability.
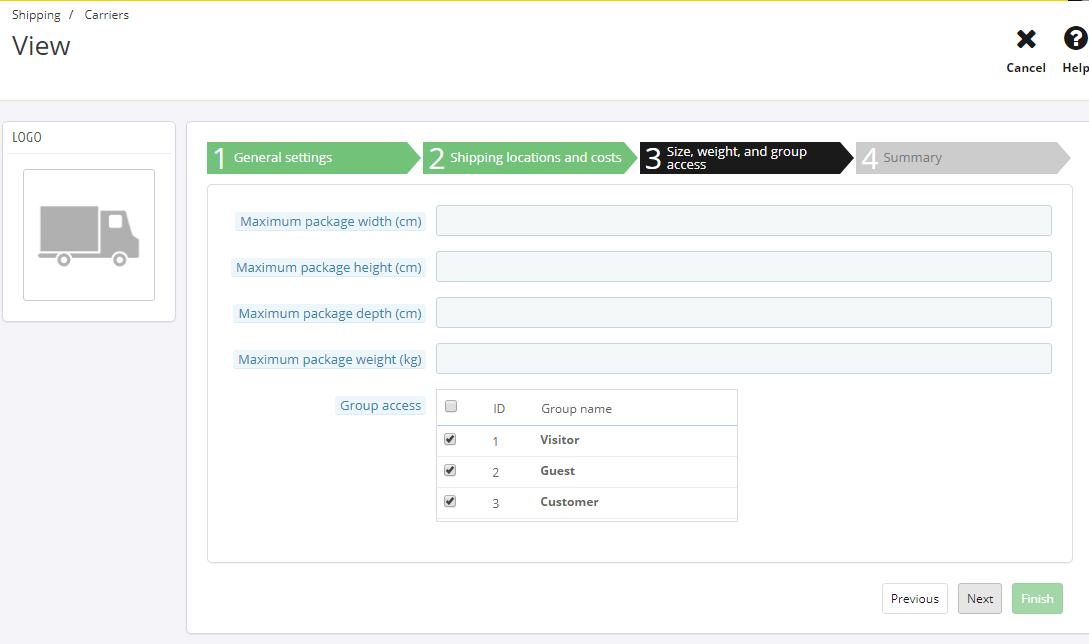
Group Access is probably the only option we will ever use, as it allows to hide the carrier from specific customer groups. This is particularly handy if we have a wholesale group that has specific shipping methods assigned to it, that need to be hidden for regular customers.
Then, in the last tab, is a summary of all of the previous options.
Let’s just hit “finish” to create the new carrier, which will appear in the carriers list.
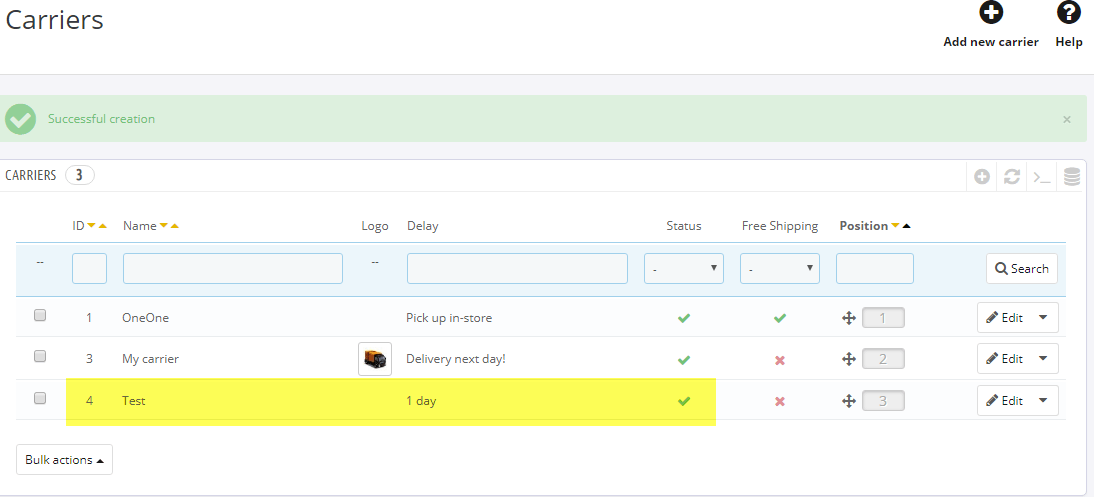
Let’s run a quick test! I set the product to weigh 1kg, so we will get a shipping cost of $5 for 9 units, and $10 for anything above 10 units.
Setting up a price based carrier
The process of setting up a price based carrier is very similar to the weight based one, except for the Billing option in the second tab. Let’s try it! I will go back to the Carriers list, and click Edit next to the carrier I just created, tab to Shipping and Locations, and change it as follows:
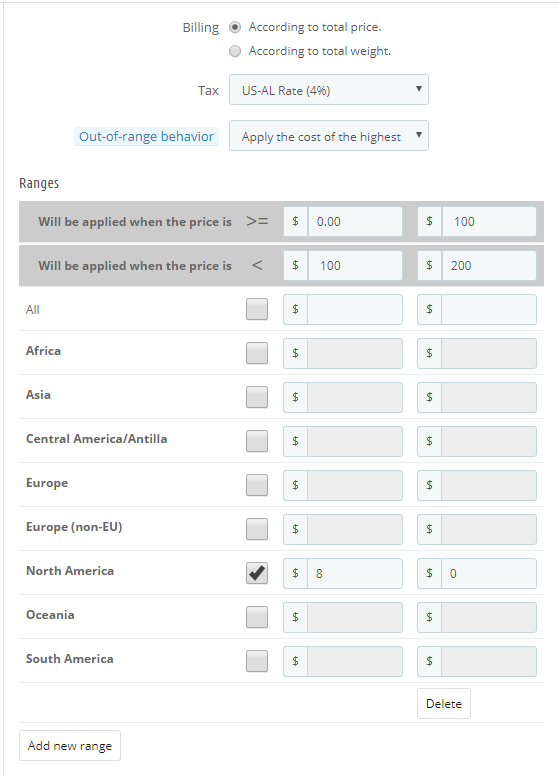
I will charge $8 for anything under a hundred dollars, and make the shipping free above that.
Carrier Preferences
Lastly, let’s click on Carrier > Preferences. From this page we can set up a variety of options to control the carriers globally:
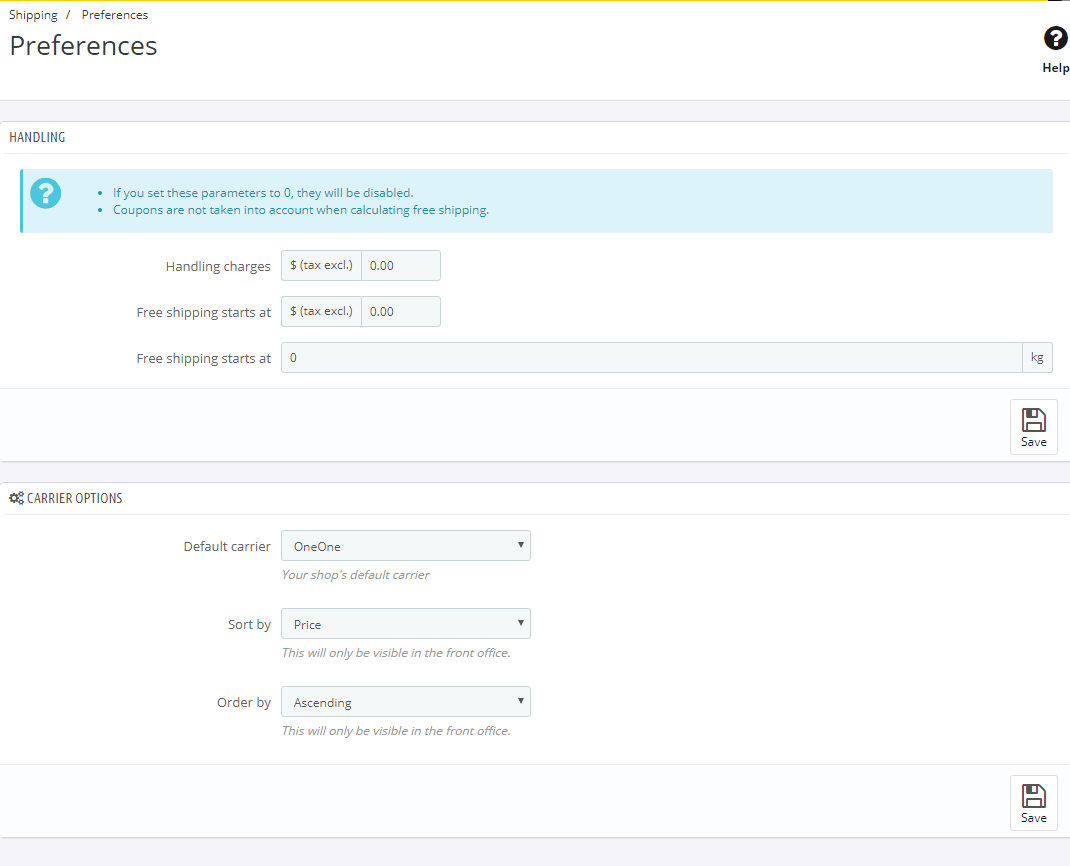
Handling Charges: This controls how much to add to each carrier’s cost in case you have processing costs.
Free shipping starts at $/kg: This setting will override each carrier’s configuration, and just make everything over a certain price or weight free.
Lastly, the carrier options are used to sort shipping options in the checkout.