One of the first things you should do when you set up Google Analytics on your website is to start creating goals. Goals are a great way to track events on your website as a metric to see how your website is doing. They can be useful to give you insight to how customers are interacting on your website and to why they might not be purchasing.
Setting up your goals
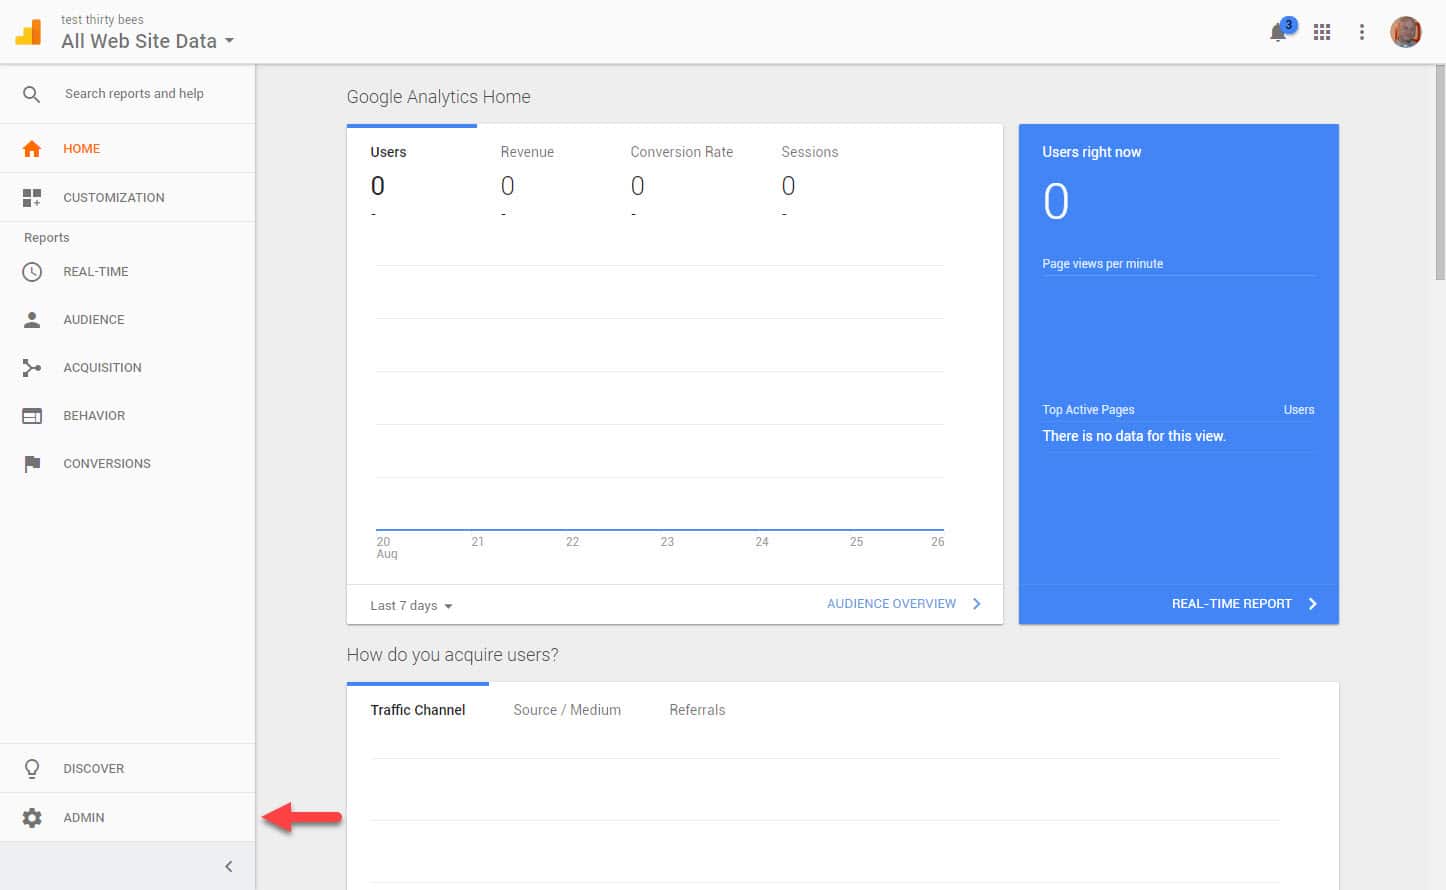
To start setting up your goals, you will need to login to your Google Analytics dashboard. Once you are in the Analytics view for your site, you will want to click the very bottom gear that says admin. You can see it in the image below.
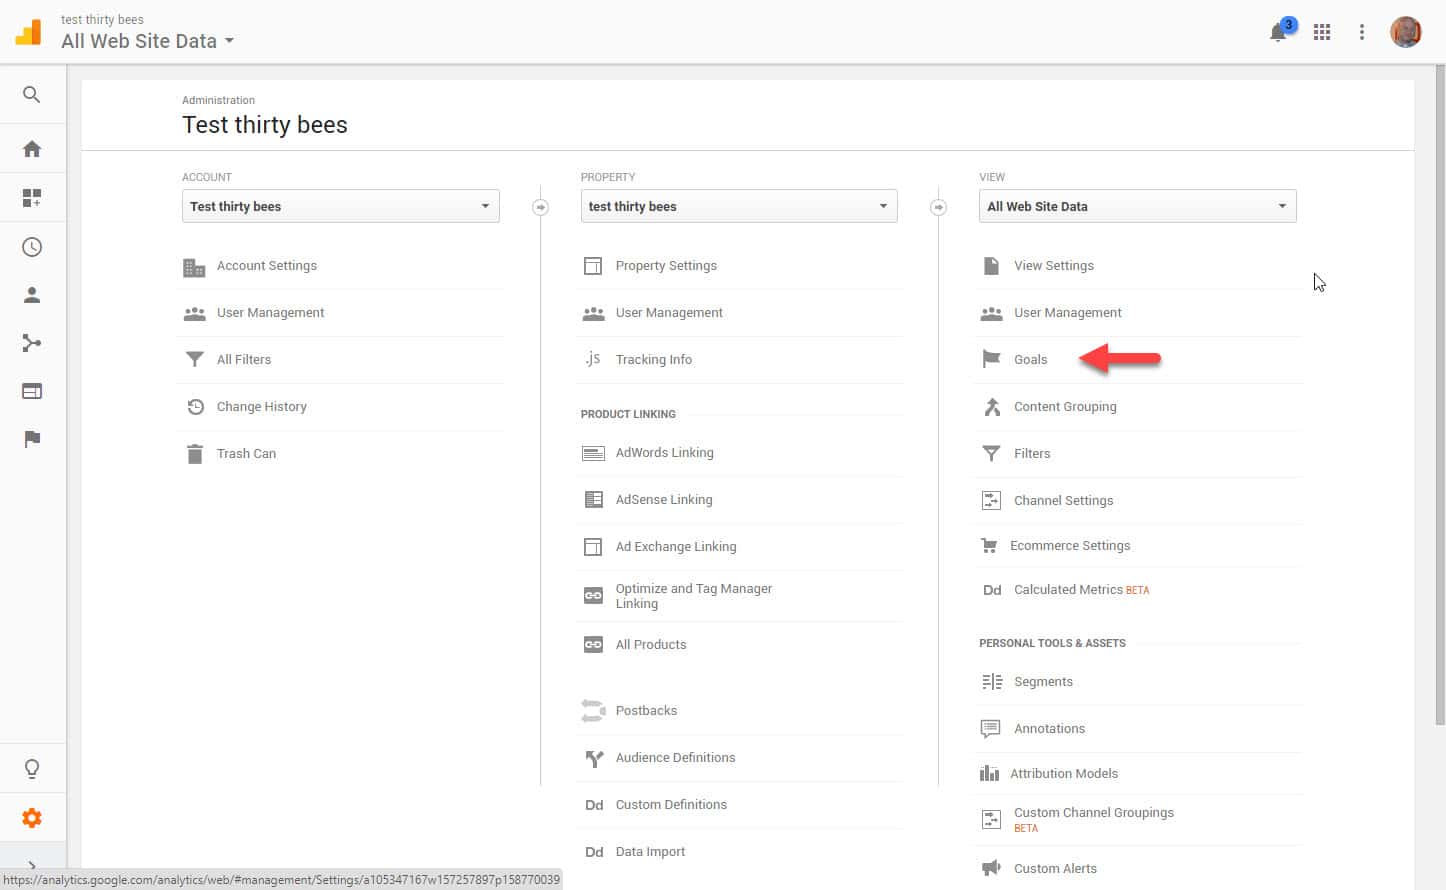
Once you click on that Admin button a menu with a lot of different options will be opened up. On the right side of the screen you can see Goals. Click on that.
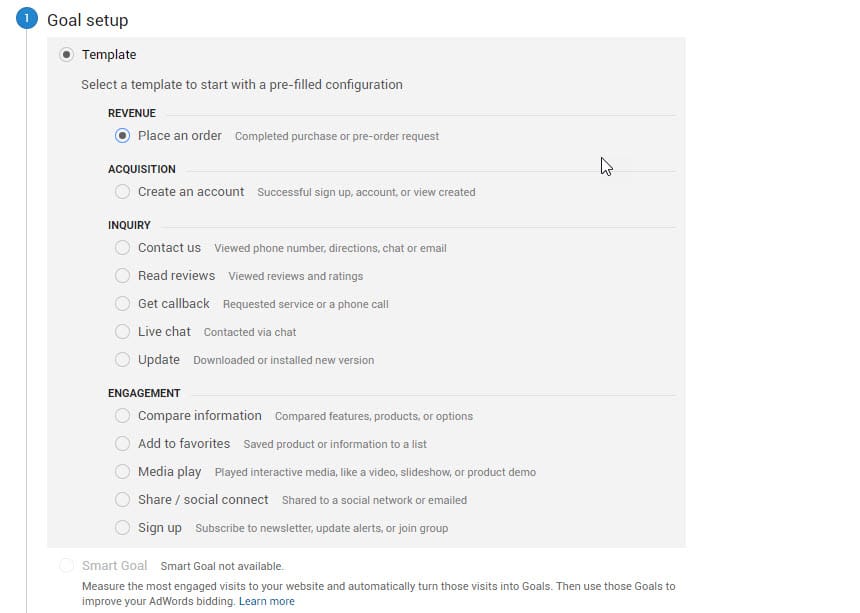
Since we are dealing with e-commerce sites, we should set up a simple goal to start with. We will setup a goal where the goal is a user creating an order. Click on the red New Goal button on the Google Analytics screen to get started. When you start setting up your goal, select Revenue and then Place an order.
Then click continue and name your goal. For the goal type you will want to select destination. Click continue and you are brought to the last page. This one can be a little tricky and might cause you to have more than one goals. You will need to enter the url of the order confirmation page. Which in thirty bees it is /order-confirmation by default. Also make sure in the dropdown next to the URL you enter to select begins with. A lot of times variables are sent with the order confirmation URL and this will make sure that all of the views are tracked. Also, it is worth noting, if you are using multiple languages, you will need to create a goal for each language as well to further refine your goals. But some modules can override this url and have their own custom order confirmation page and url. So you will need to test every payment gateway on your site to see if they use the default url.
Now you have created the first goal on your site. From here you can start tracking your order values and also start setting up A/B testing using Google Optimize.


Great Lesley! Every Beginner can follow this tutorial, thanks to the screenshots. They also help alot, if you don’t use GA in english.
Great article Lesley (and to be honest everything that you have published here),
I will only add that when you insert the Destination page (/order-confirmation) on the last step you should check the “Begins with” option from the drop down menu and if you use more than one language, you have to create one goal for every language:
/en/order-confirmation
/el/order-confirmation
etc.
The above are tested and confirmed on thirty bees 1.0.2 and Prestashop 1.6.6
You are totally right. I have added that to the article now. Thanks.
This is such a great article, Probably the one I refer to the most when I started setting up my shop an the analytic for the shop