In part one of this mini-series, we will go through all you need to know in order to add new products in thirty bees.
Basic Product Information
In thirty bees, we can create a new product directly from the products list. Let’s access it by clicking on Catalog from the left hand menu.
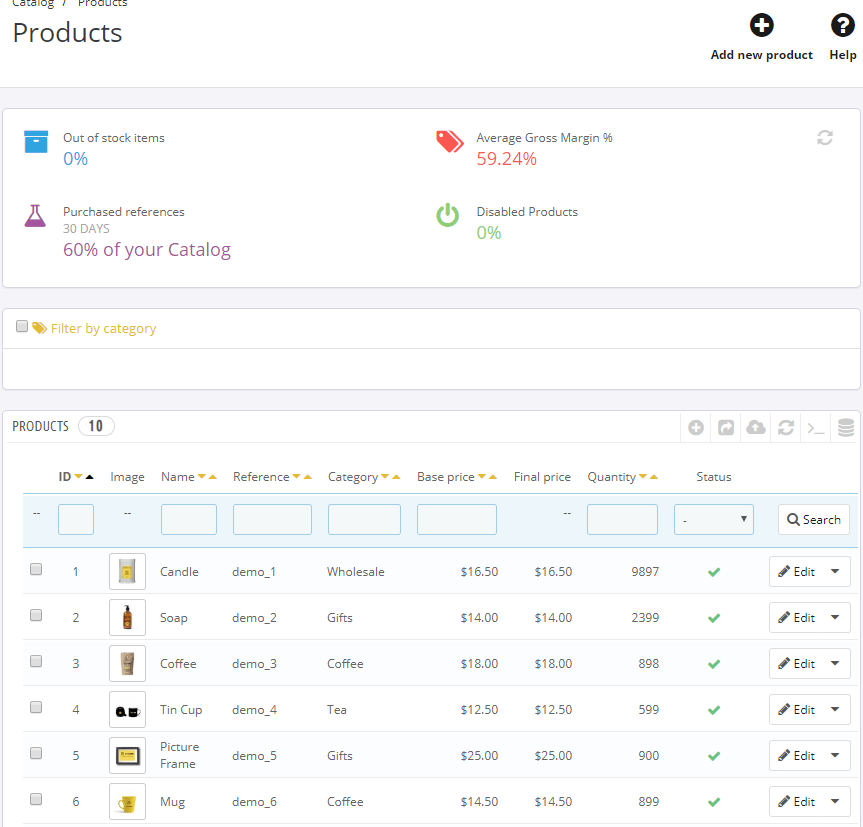
This page lists all of the products added to the shop, both enabled and disabled. The list can be filtered by category, using the yellow button above it, or various properties for each product, through the search filter.
Let’s create a new one! Click on the large Add a new product button on the top right.
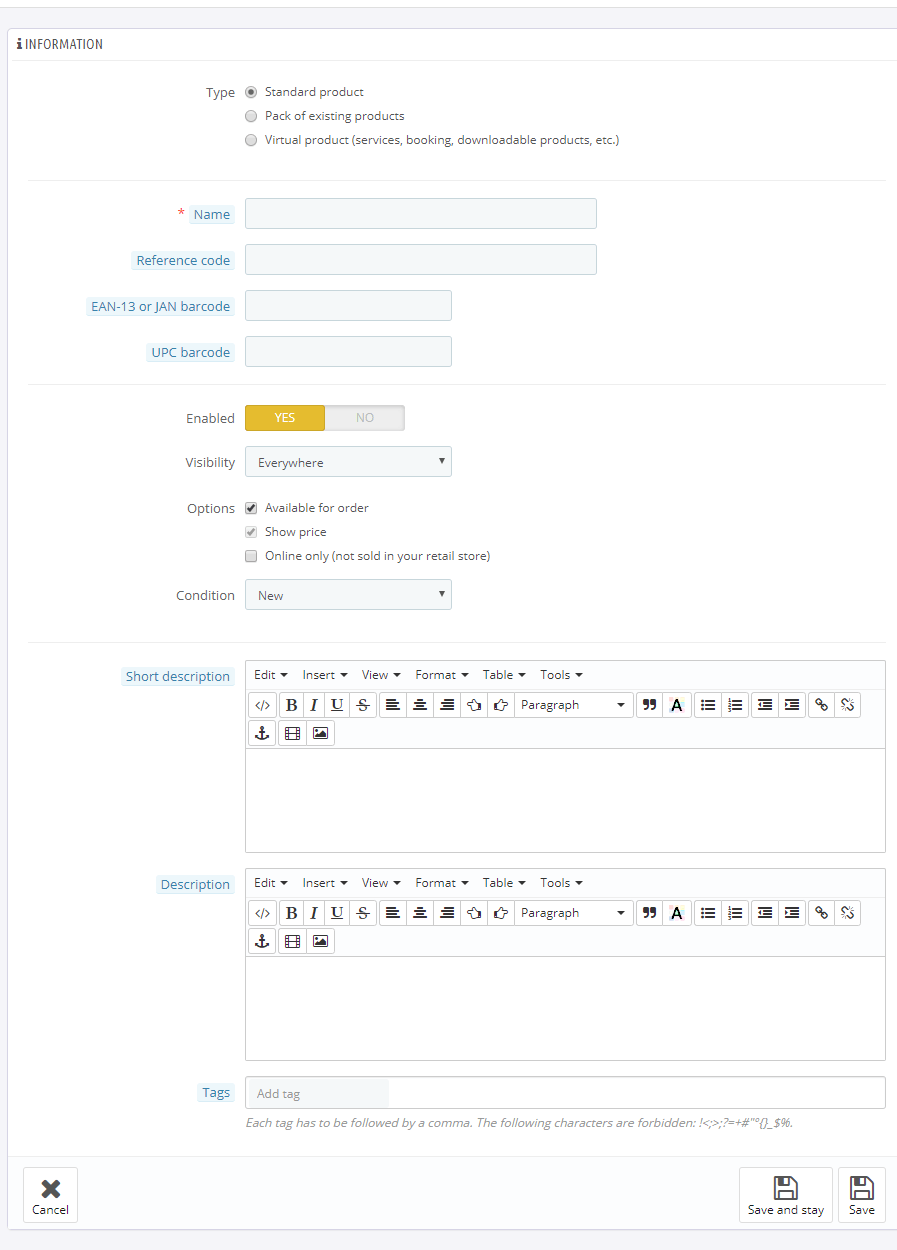
The first page we are presented with will contain all of the basic information for this product. Let’s go through the fields one by one.
Type: thirty bees natively supports three types of products: Standard, Virtual, and Pack. We will have an in depth look at the other two in the next article, so for now let’s leave it set to Standard.
Name: as the label suggests, this field contains the actual product name, used to identify it in both the front and back office. This field is required.
Reference code: this text will be displayed alongside the product name in the single product page, as well as the product lists for each order. It usually contains some unique reference code that might help you identify the product when shipping.
EAN-13 or JAN barcode / UPC barcode: these fields should contain eventual barcodes for your products, especially if you sell books.
Enabled: a product that is enabled will be visible in the shop, but not necessarily available for purchase. If we set it to No, the product’s url will not be accessible, and we can choose what to do with that page: either spawn a 404 not found, a temporary redirect, or a permanent redirect. This is particularly useful for products that have been discontinued, but are still indexed by search engines.
Options: these are various options for when a product is enabled. We can choose whether or not to make it available for purchase, whether or not to show the price (which must be enabled if people can purchase it) and if we want to display a special badge on the product’s picture, stating it’s only being sold in your online shop.
Condition: this is rarely used, unless you have listings that are either used or new, but cannot be both and chosen by the client (choice for which combinations, that we will see later, are much better).
Short Description: is a shorter paragraph of text that will be displayed in the product list and at the top of the single product page.
Description: is the full text listing all of the product’s details, displayed on the single product page.
Tags: are keywords used to identify the product in some way, and come in handy only when used in conjunction with the tags Block Module, enabling the customer to list, for example, all products that are related to the word “laptop”.
Let’s fill the various fields with generic information, leaving the options as default, and click Save And Stay.
Great! The product is now created, and can already be accessed from the front office. Let’s click Preview at the top:
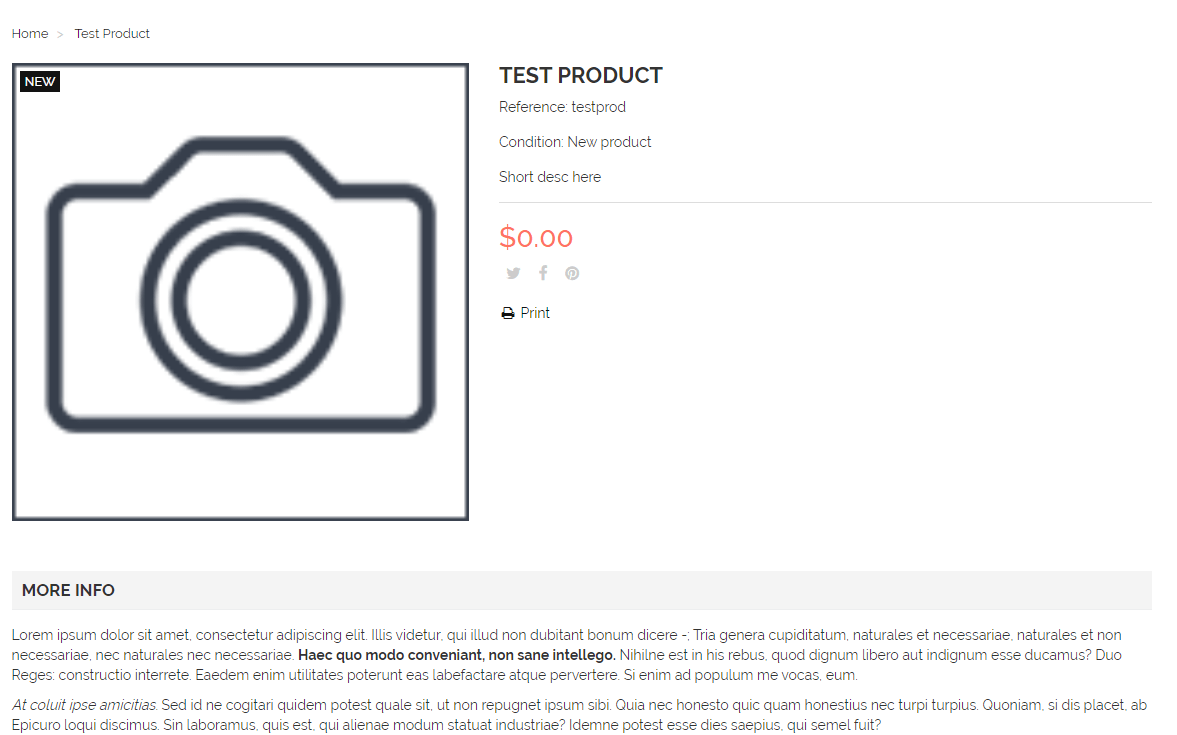
It doesn’t look so good without a price and images, does it? Let’s spice it up!
Price and Images
Back to our Admin page, let’s click on Prices on the inner left menu.
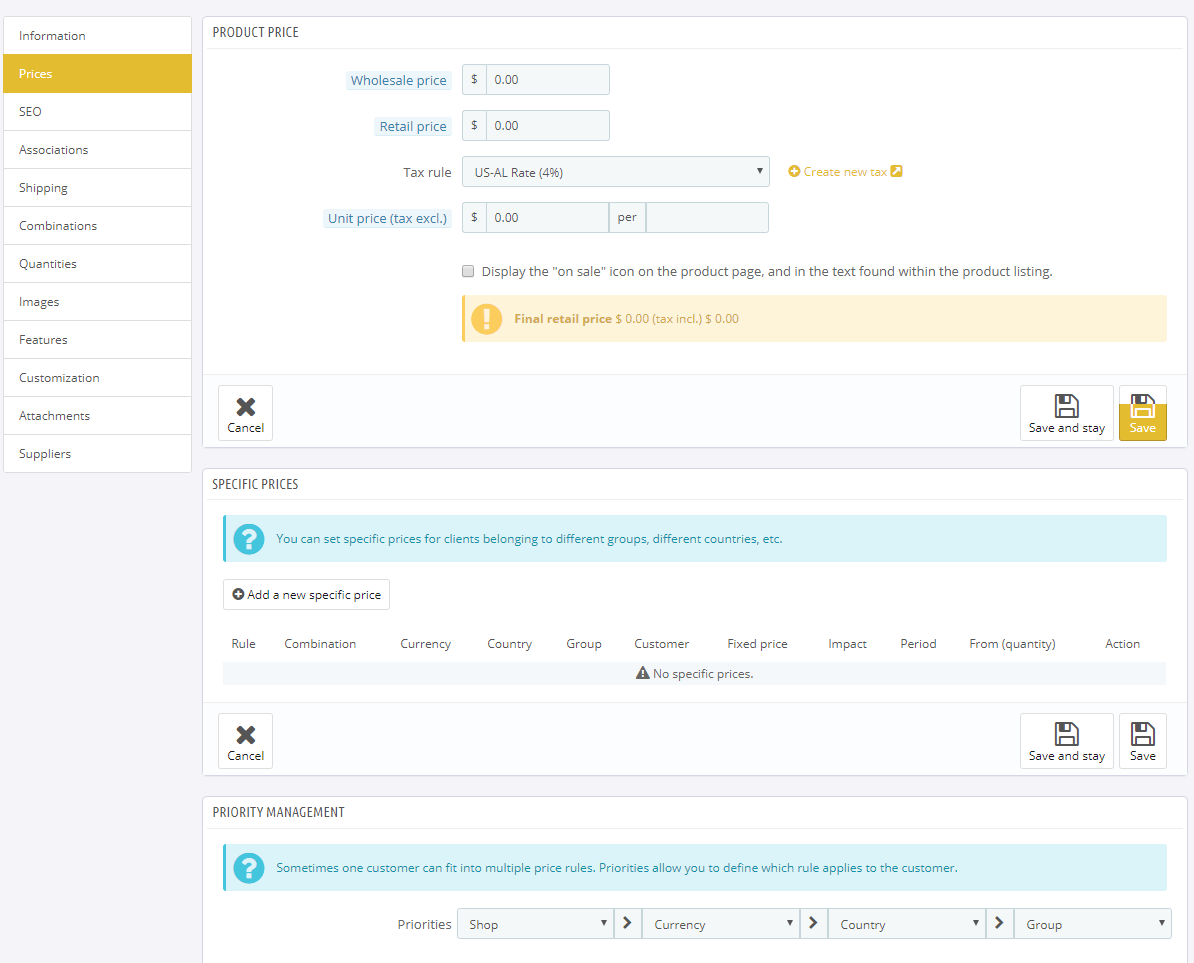
Starting from the top, we have Wholesale Price, which is only used internally for calculating your revenue, as it is the price your bought the product at, from the supplier; then Retail Price is the base price that will be displayed in the front office to the customer. Let’s set this one to something like 20. This price will be increased according to what is set in the Tax Rule box, in this case 4%. When clicking on the tax rule select, you will see a list of the available tax rules, that has been pre-populated based on the country chosen when installing thirty bees. Of course, these can be modified and new ones can be created.
Unit Price is purely informational, and displays the price per unit in the front office. For example, if you are selling a crate with 6 bottles, you can show the customer how much each bottle will cost.
The Specific Prices area is used to create discounts specifically for this product.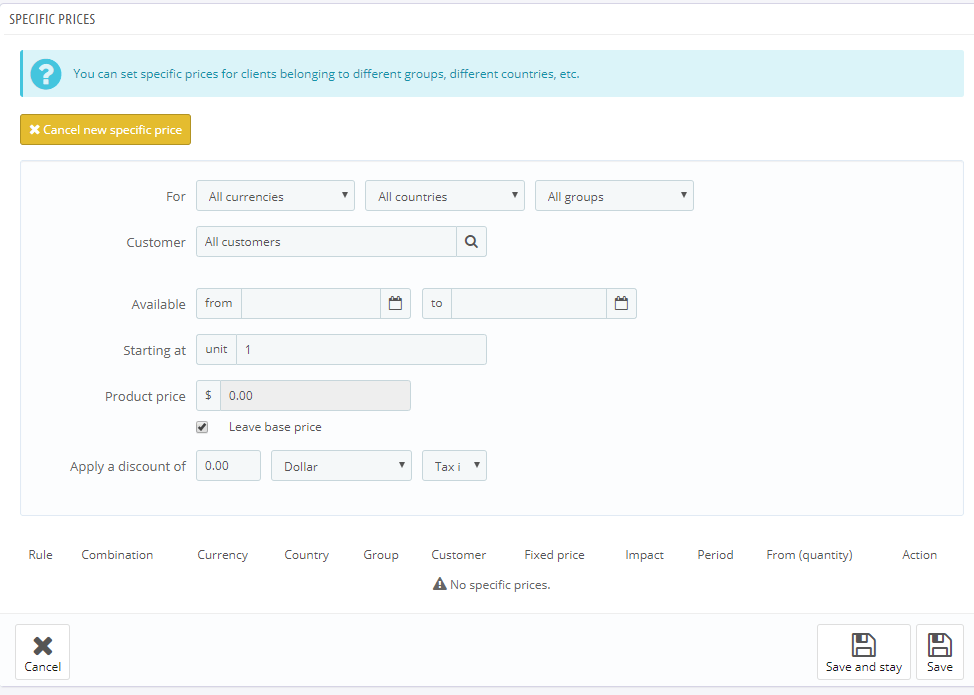
We can add static discounts or percentage ones, based on various options such as currency, country, customer group, date, or even create a special price for a single customer. We don’t really need them for a single product, so let’s just click on Images in the left menu.
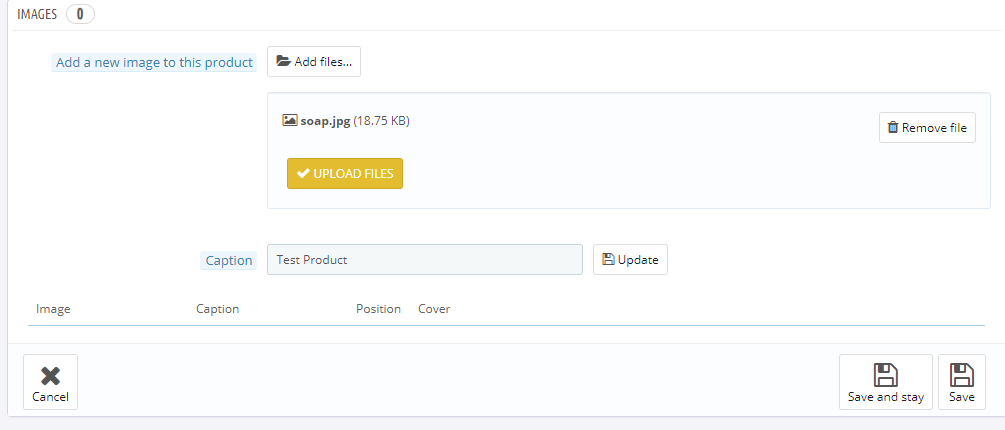
Let’s click on Add files… to choose an image for this product, write a meaningful Caption, then click Upload Files. The new image/s will appear in the tab below. Let’s click Save and Stay again, then Preview to see what the product looks like now:
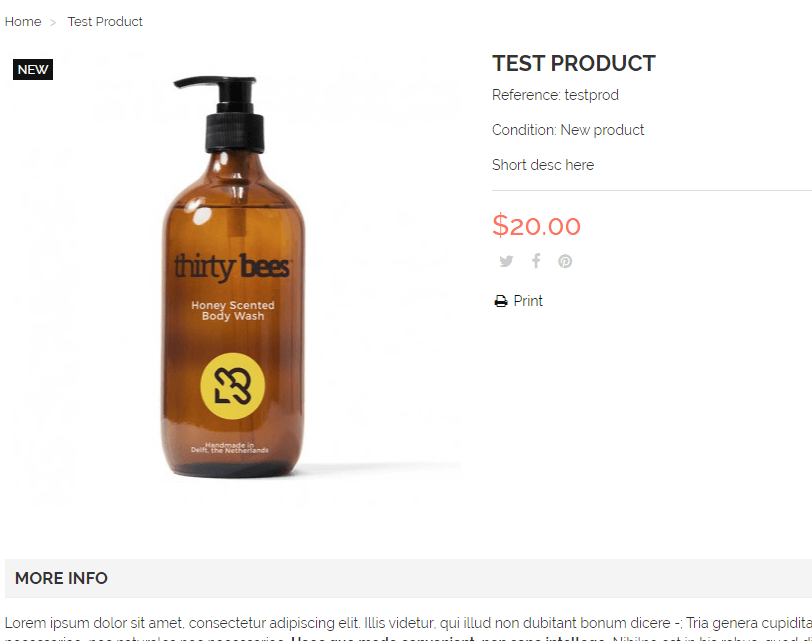
Better! But wait, there are two issues. First, you can see there is no Add to Cart, because the product currently has 0 set as quantity. The second is that the product cannot be reached, unless a customer uses the search function, or we are using the homepage featured products module. Let’s add some stock, as well as a category for it.
Categories and Quantities
Back to the previous page, let’s click on Associations:

This is where we can set the category, or categories, for the product. The interface is really easy to use: just check the box next to the category. Right now only Home is selected, and by default, in a new installation, the Featured Products module will take care of displaying the Home category products, in the homepage of course. I will assign this product to Coffee and Tea , then also set its Default Category to it. The default category is where the products are displayed by default, and inherit discounts and visibility from.
Accessories are not necessary for our simple product, but just so you know, they display products that are related to this main one, such as a phone cover could be to a smartphone product.
Manufacturer can be used to indicate extra information about the product’s make, such as Apple, or Samsung. Manufacturers can be added through as separate interface as well.
Next, let’s click on Quantities:
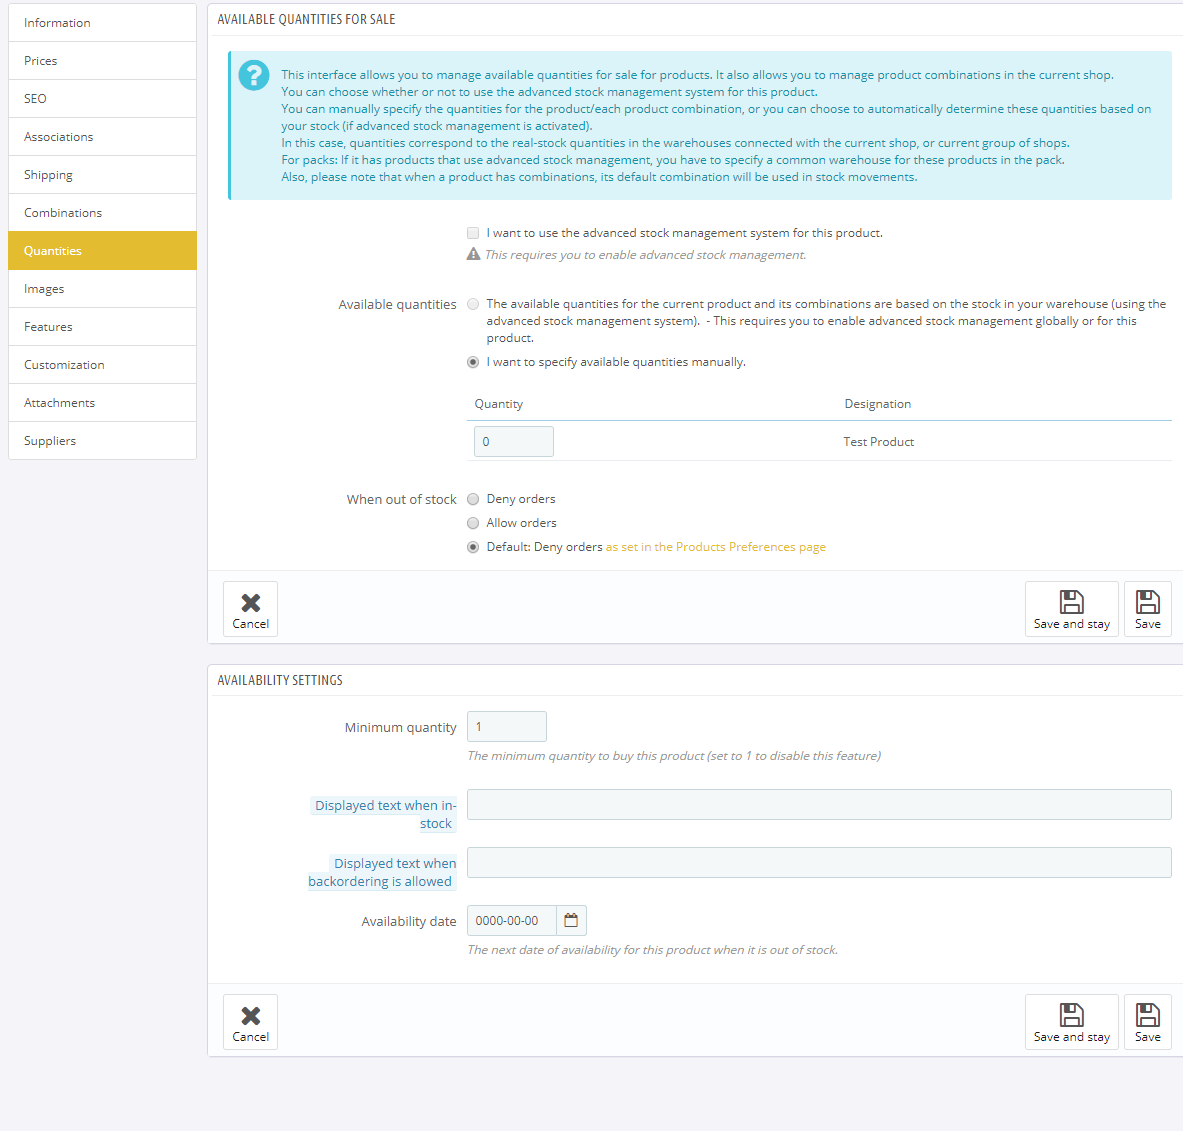
This interface might be confusing, but unless you want to use Advanced Stock Management (with warehouses, and more), then only setting that really matters is Quantity: let’s change it to something larger than 0.
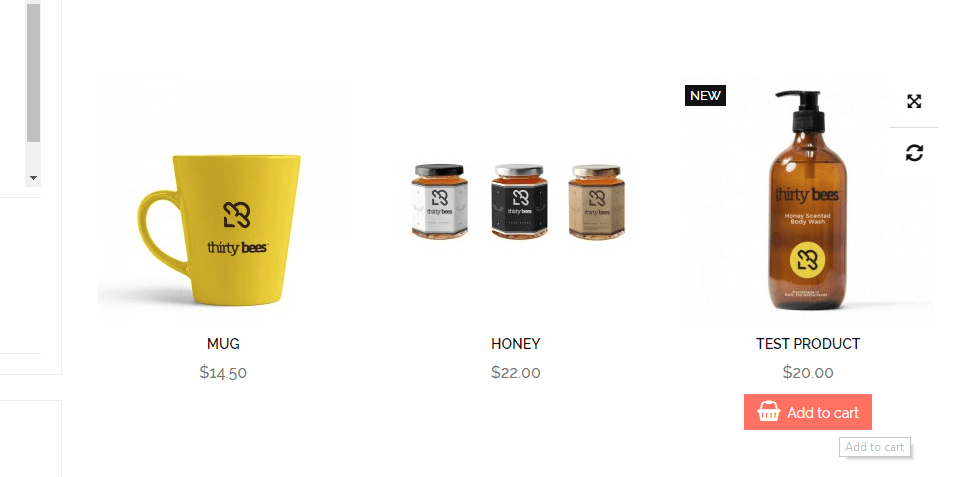
When out of stock determines the product’s behavior when the quantity is 0. Right now it’s set to deny orders, and that is why we did not get an Add to Cart button in the front page. If we do allow ordering this product when it is not in stock, we can set some custom text below, in the Availability Settings tab. We can choose the minimum amount of units that can be purchased, what the text should read if it’s on preorder or backorder, and eventually when this product will be available. All we really needed was setting the quantity in any case, so let’s save and stay, then check the front office, first the category:
Then the product page:
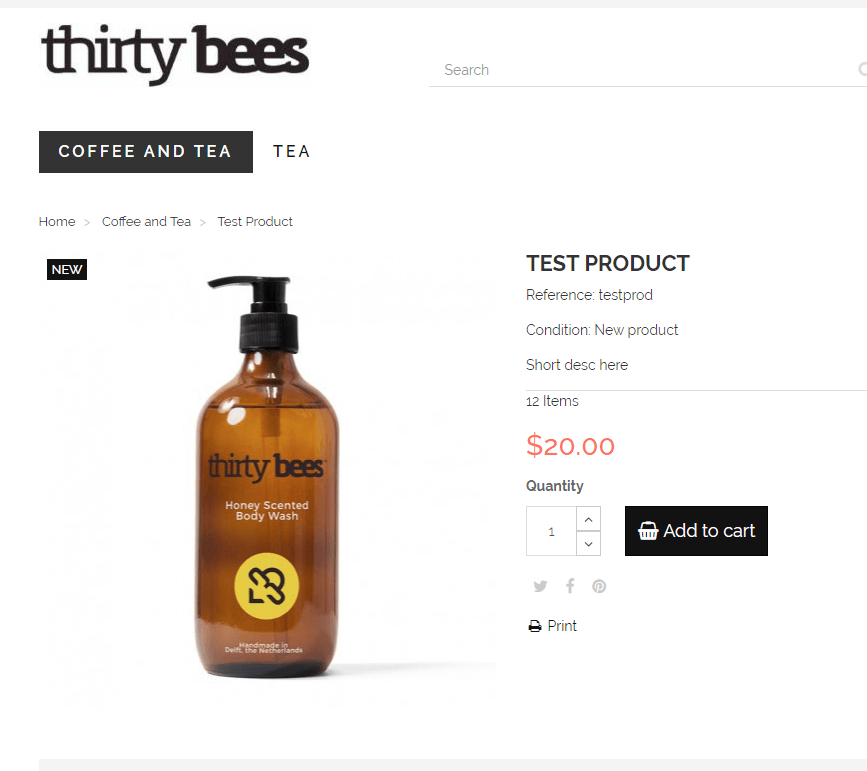
Awesome! The product is ready to be sold!
This is everything for part one. In the next installment we will explore some more in-depth options, to take our products’ characteristics to the next level!