We have had a lot of questions about how to contribute to thirty bees from users that either use Windows or are not very familiar with GitHub. GitHub and using git can be daunting at first, but once you get the hang of it, it is not that hard. Today we will walk you through step by step of making a contribution to the community-default theme.
Getting started
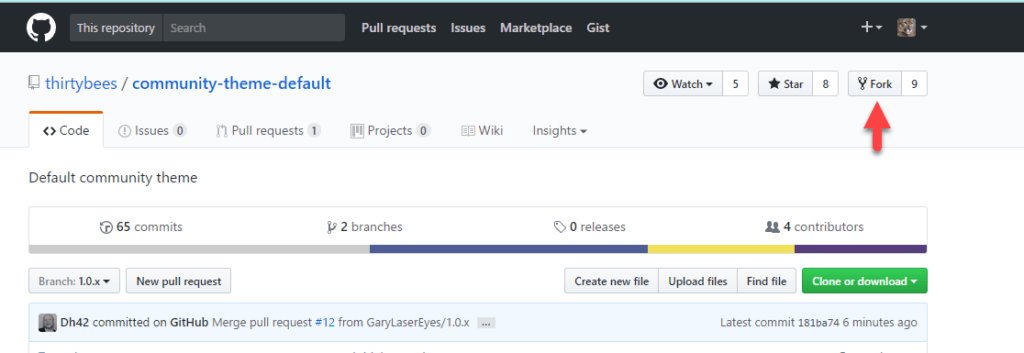
The first thing you need to do is to set up a GitHub account. It is a free account and it will keep track of all of your contributions to our project. You can sign up for a free GitHub account here. Once you have signed up for an account, visit our community-theme-default repository. Once you are on the page, you will want to click the fork button in the top right corner.
The way GitHub works is you for the repository into your own repository, then you make changes to your version of the repository, after that you can make a pull request of those changes to our repository. It sounds complicated, but it is not really as complicated as it sounds.
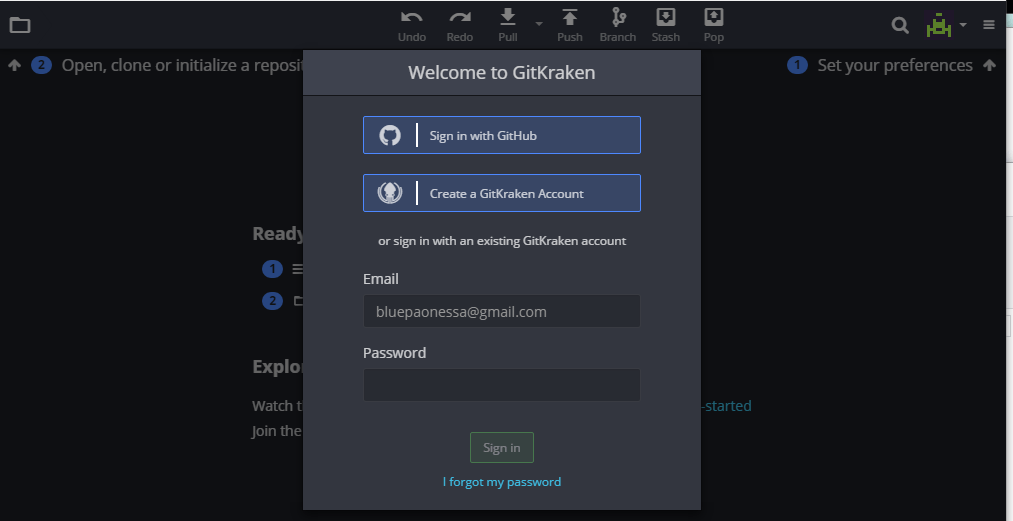
Once the forking has finished, open a new window and download GitKraken, it is a client for using GitHub on windows. You can download GitKraken here. Once you download it, click it to install it on your computer. After it installs you will be presented with a screen like the one below.
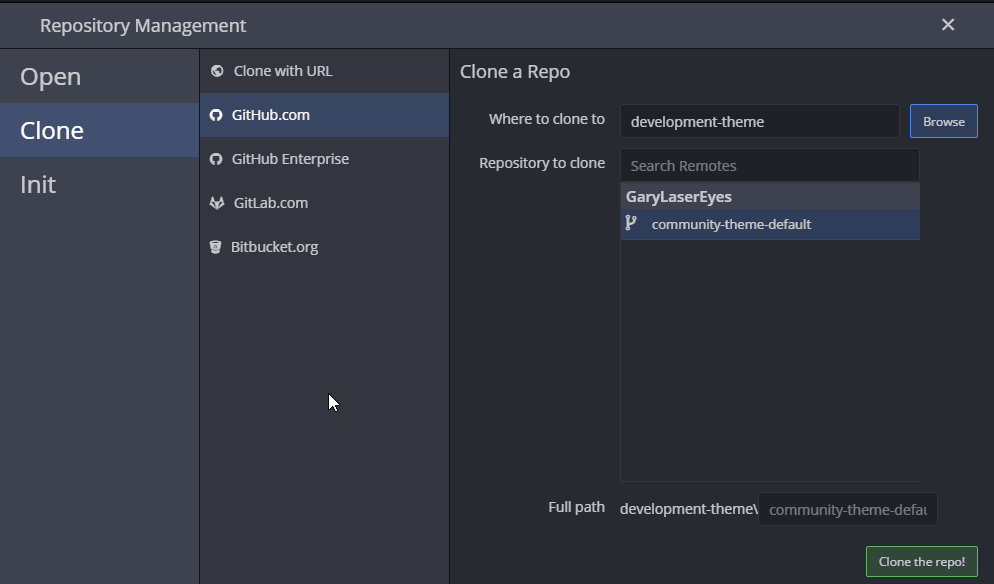
Click the sign in with GitHub account button, it will open a browser window and automatically connect your GitHub account in GitKraken. Once this is done, click the folder icon in the left hand corner with the number 2 and arrow underneath it. From the dropdown menu click click clone, then GitHub, it should open up a panel with your forked repository in it. Click the browse button next to where to clone the repo and select a directory on your computer to clone the repo to. Once you have selected on, click the clone repo button.
It might take a couple of minutes, but once it is done your screen will look like the one below. Click the open now button and the repository will open on your computer.
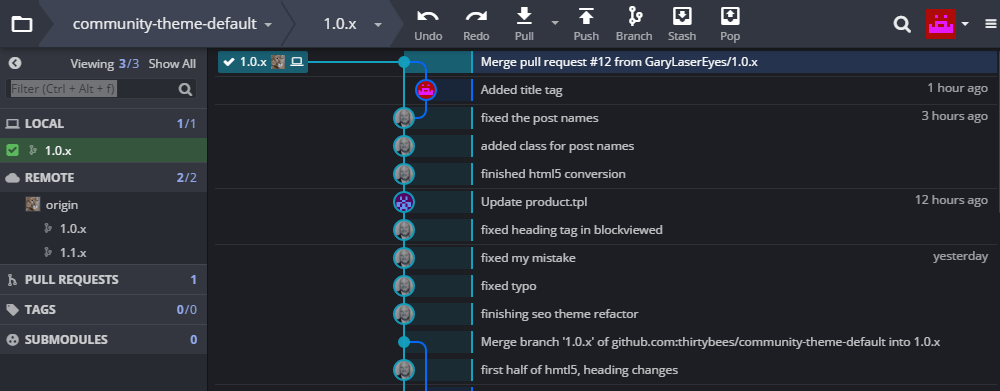
Once the repository opens up you will be able to see the history of the commits to the repository. Its pretty technical and not really needed when you are first starting out, but it is there if you want to review the changes over time. It will look like the image below.
Now what you will want to do is open up a file in whatever code editor you use. For this demonstration I am going to be using Sublime Text 3, you can download it here.
The file I am going to open up is the cmp.tpl file. I am going to add a title tag on one of the links in the file that is missing one. You can see what I am talking about in the image below.
See the highlighted line, that link could use a title tag, so all of the links in the loop would have proper tags. I am going to add a dynamic title tag in the loop and save the file. Adding this title tag will help out with both SEO and for customers that might use screen readers. Below is the snippet of code with the tag added.
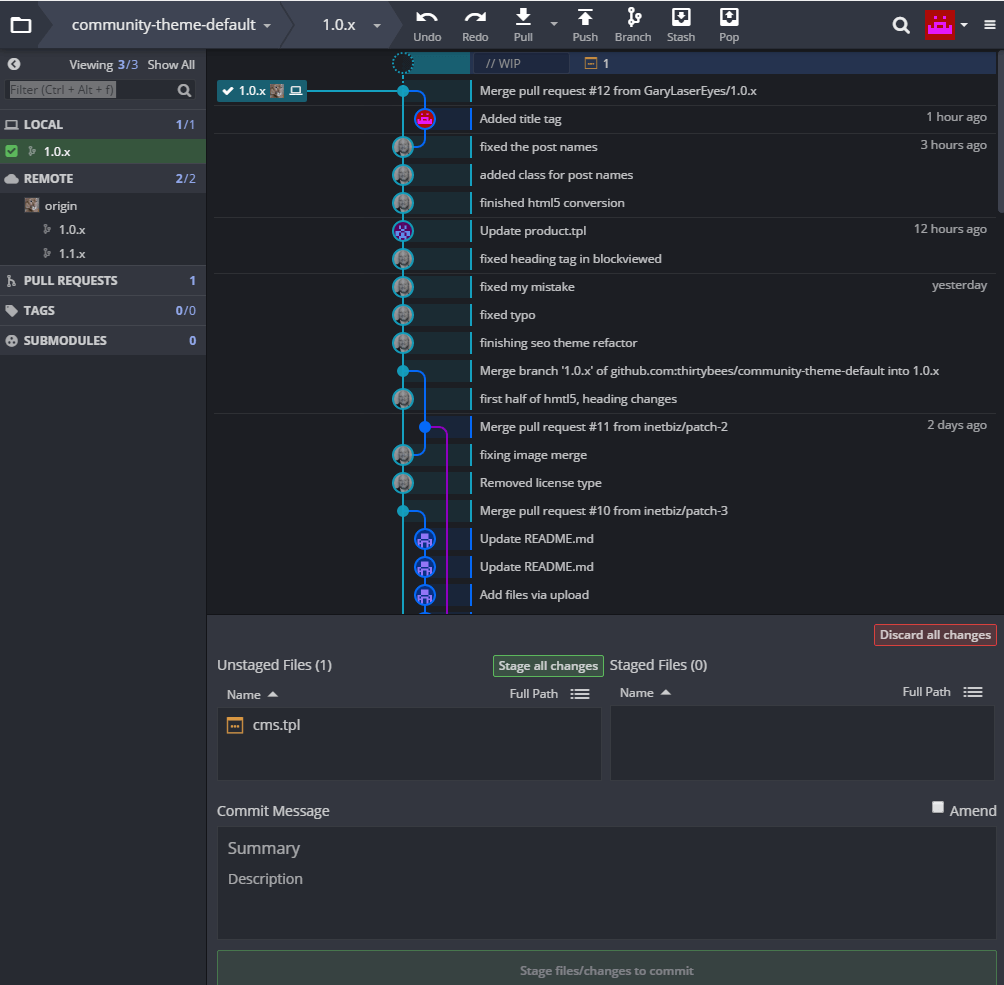
Once I save the file, I can go back over to GitKraken, at the very top of the screen it has picked up the file that I just saved and labeled it a WIP (work in progress). Your screen should look similar to the screen below.
What you will want to do now is click the stage all changes button. What this button does is groups all of the edited files into one nice clean commit, this is very helpful if you have to edit something that has multiple files. Once you press the stage all changes button, you will want to fill our the summary of what you have done and the description as well. This helps us know what changes you made and why you made them.
Once you have filled out the message you will want to click the big green commit changes button. What this does is prepares your changes to be sent to GitHub. Once you press the commit changes button, you will want to go to the top menu and press the push button. Pressing the push button sends your changes to GitHub. This does not send the changes to us however.
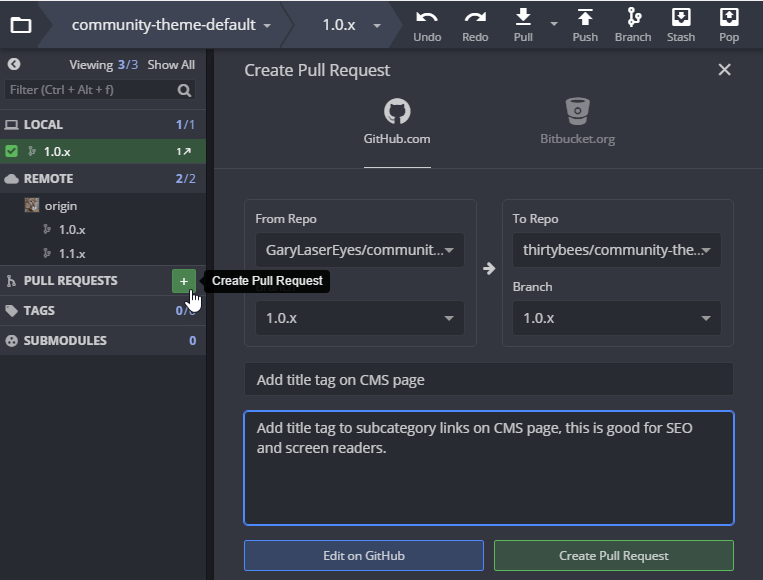
To send the changes to us, you will want to make what is called a pull request. To create a pull request, hover over pull request in the left menu and click the plus sign to create a pull request. It will open up a panel like below.
You will need to select your repository for the repository in the From Repo and you will need to select our repository in the To Repo. Then you will need to write a pull request message letting us know what you have changed and why. Once you have done all of that you can click the green create pull request button. You should get a blue notification that lets you know you have successfully created your first pull request.
You can go to our repo and check for yourself to see if the pull request made it. If you working on the community theme default, your pull request should be here, https://github.com/thirtybees/community-theme-default/pulls
You should be able to see it like in the image below.
Now you have created your first pull request and have started contributing to Open Source Software. We will review your request shortly and might even comment on it or send you a message about it. If you have any questions feel free to ask them below in the comments section.







If you have any questions about contributing on GitHub let us know.
https://xkcd.com/1597/
The alt text is especially good.
:’)